Step by Step Tutorial
Introduction
The Order and Pay API allows integrators to connect to customer accounts to retrieve restaurant data, create orders, and apply payments.
There are two types of online orders:
-
Local Orders are for dine-in.
- They allow you to assign the order to a table in the restaurant.
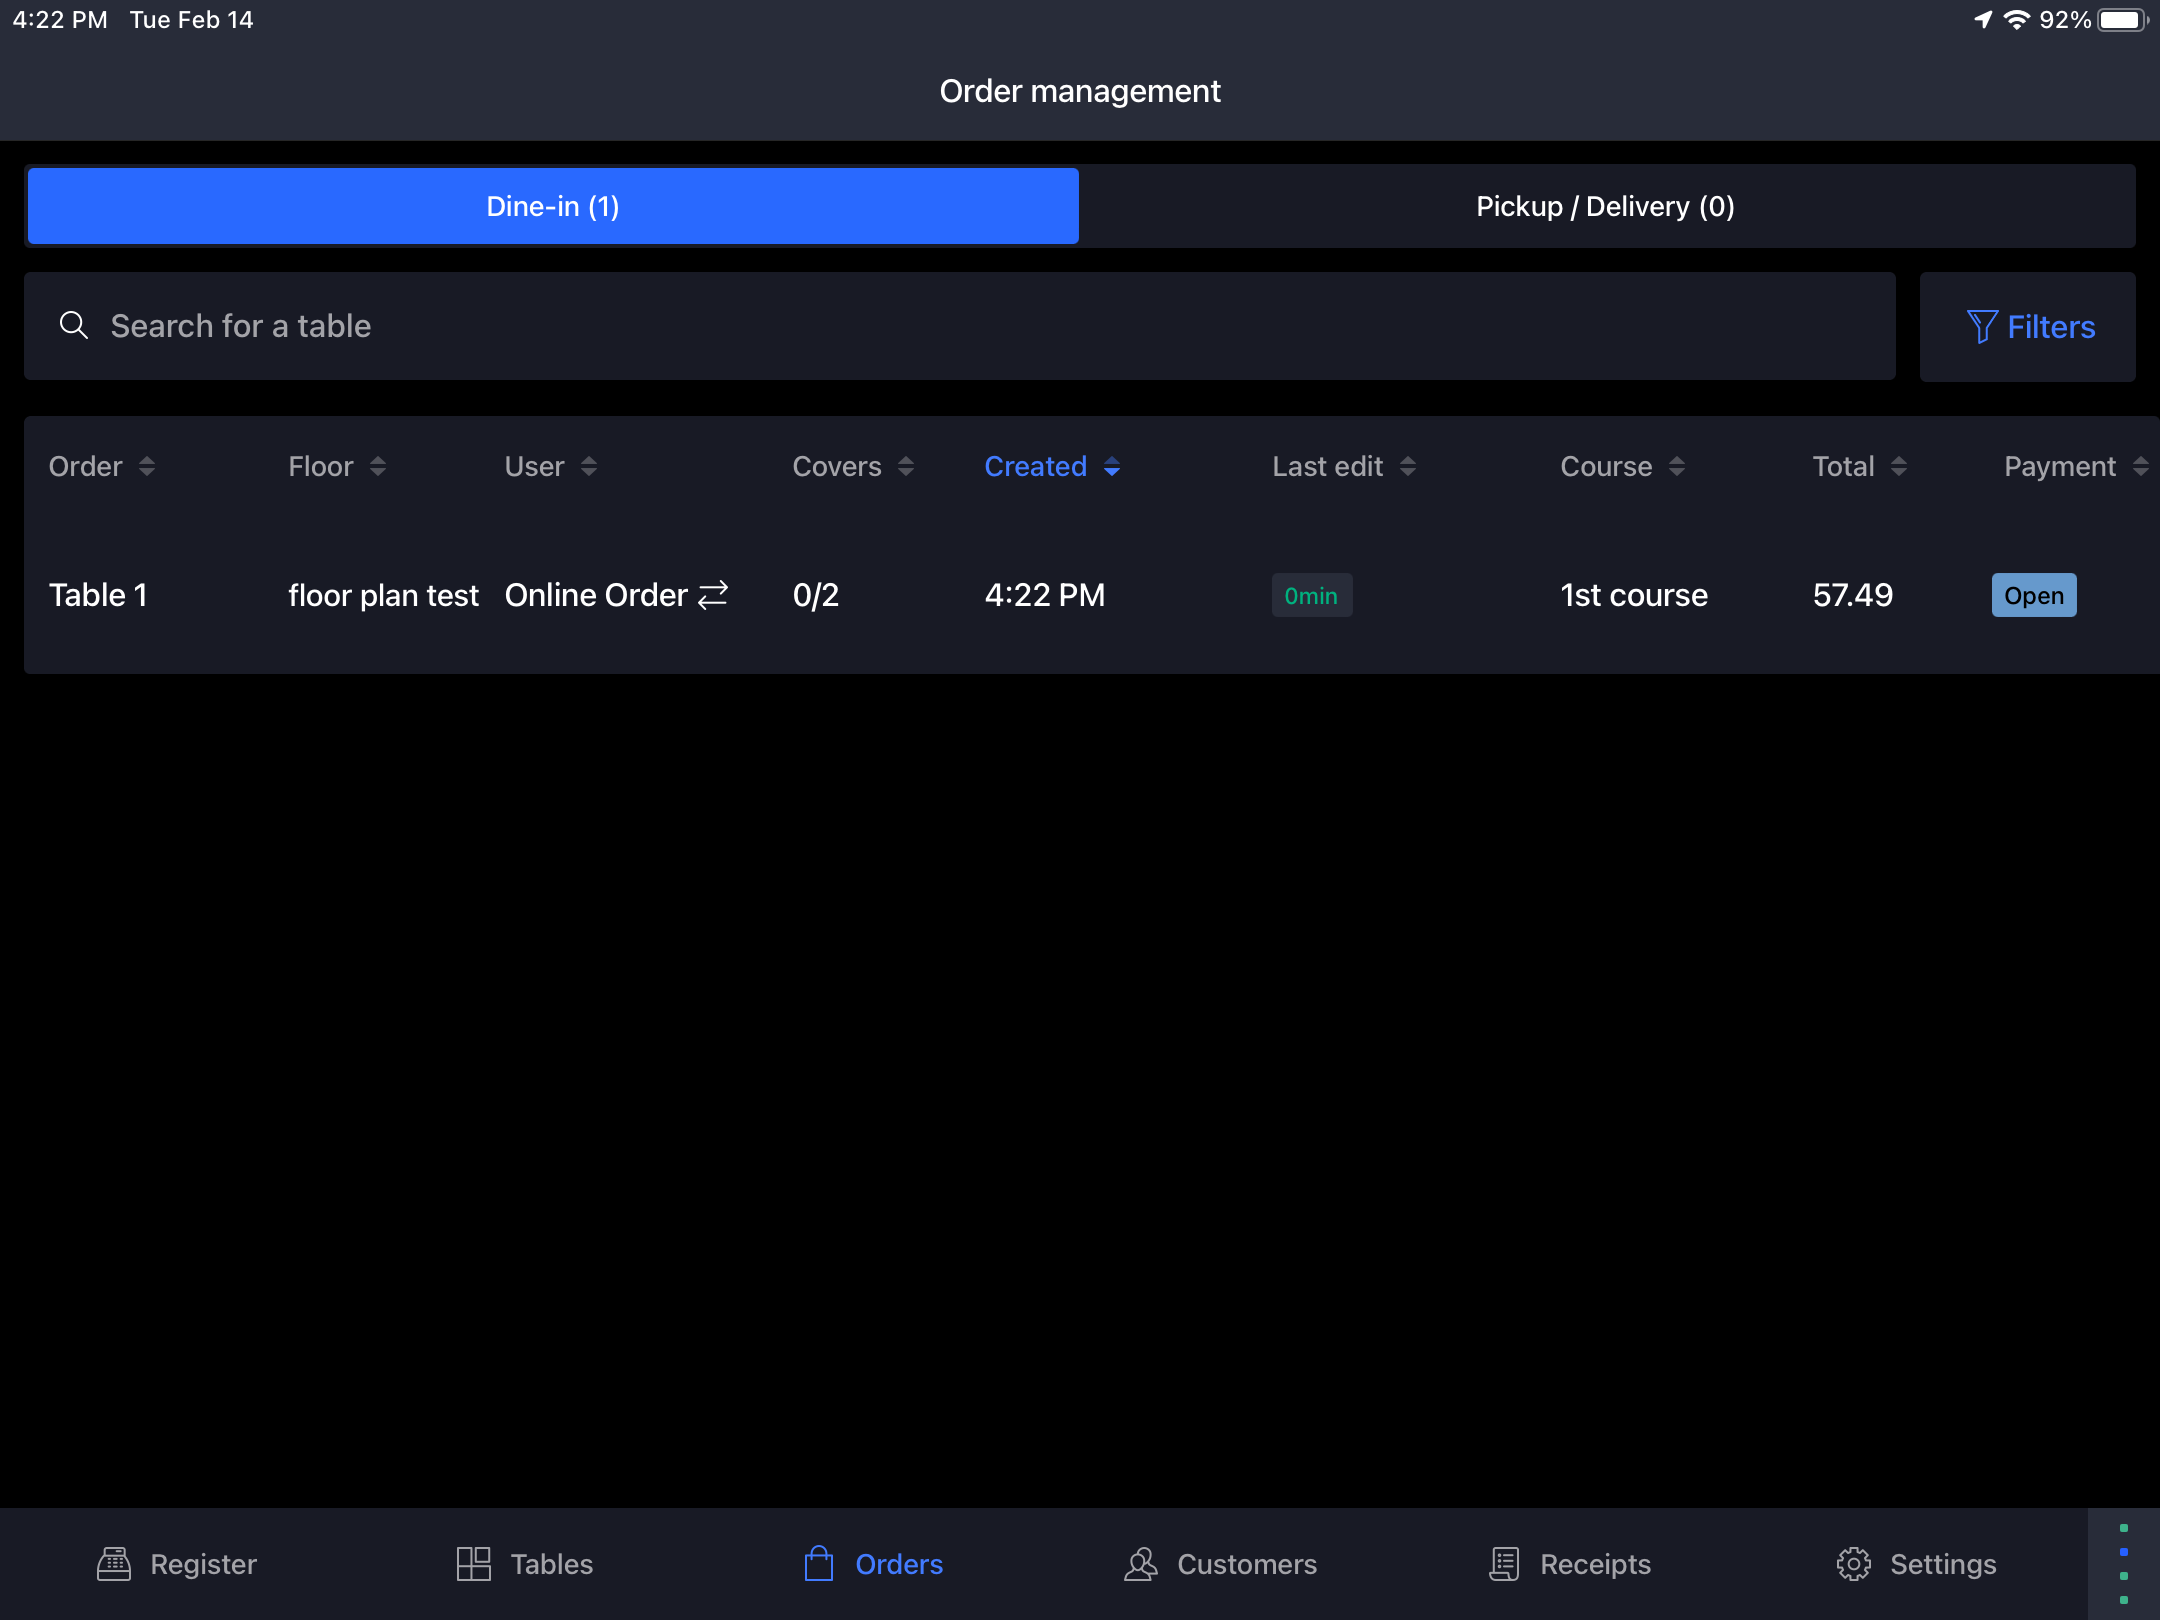
- When they are awaiting payment, they appear in the 'Dine In' section of the Orders tab in the POS.
-
To Go Orders are for delivery and takeaway.
- They allow you to set a delivery address and/or a collection time.
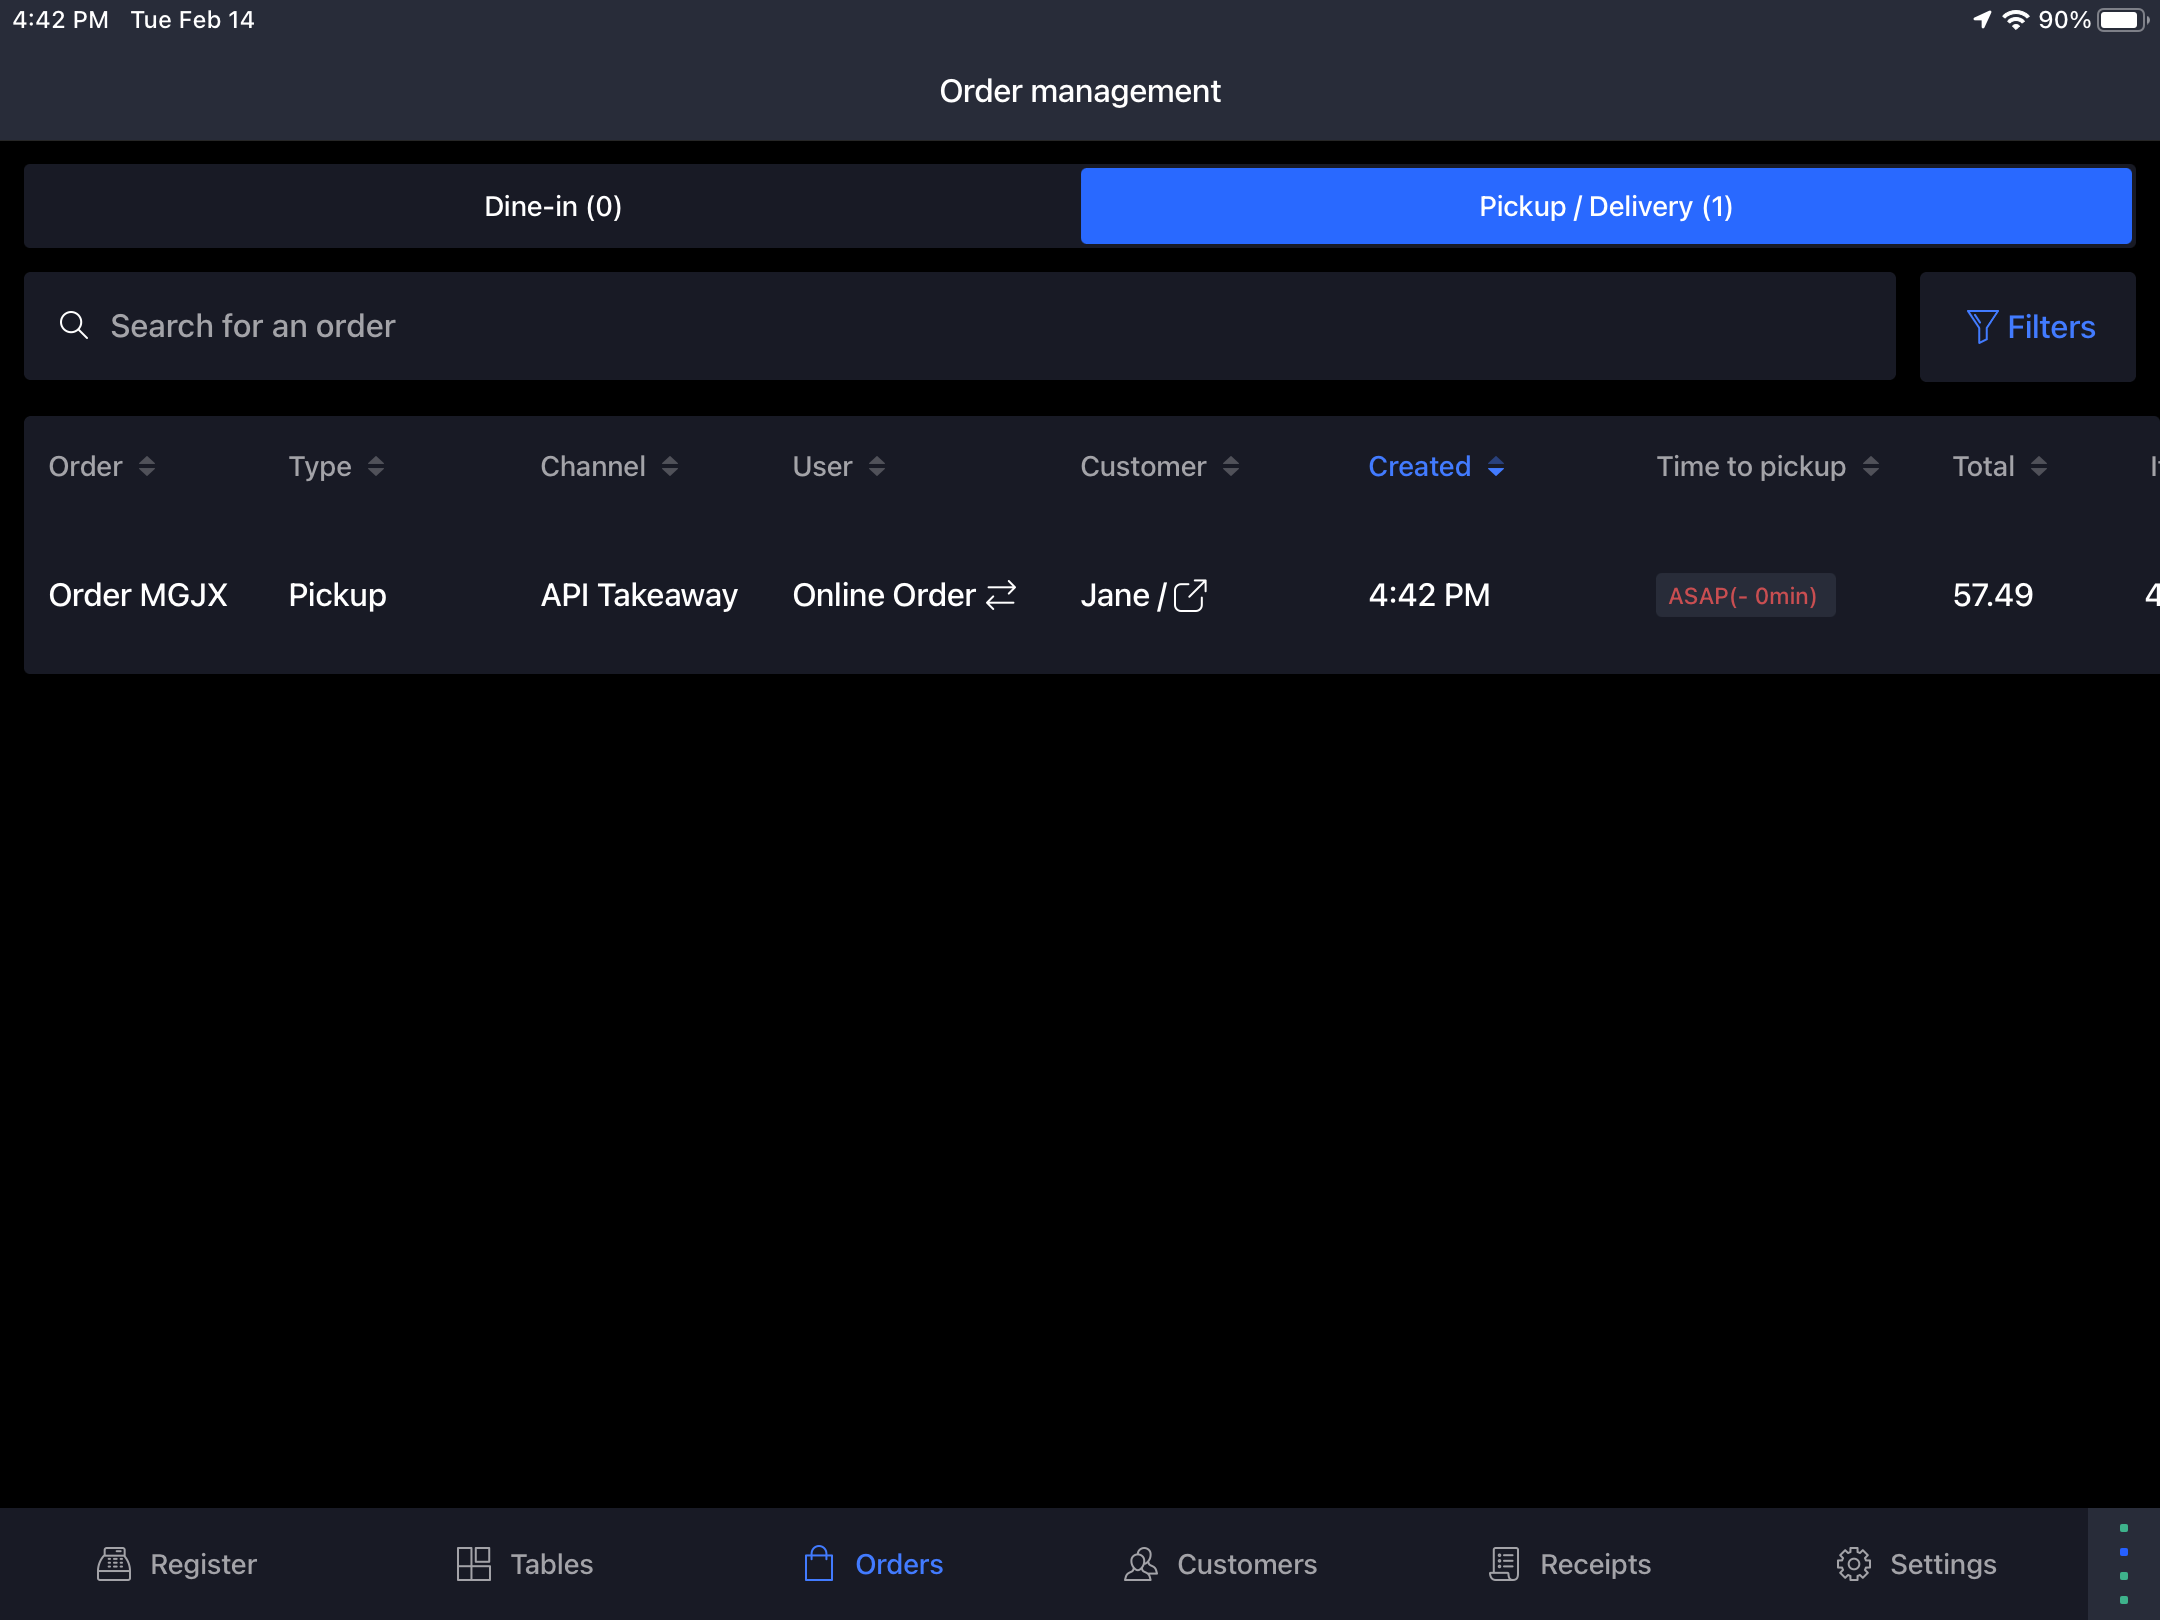
- When they are awaiting payment, they appear in the Pickup/Delivery section of the Orders tab in the POS.
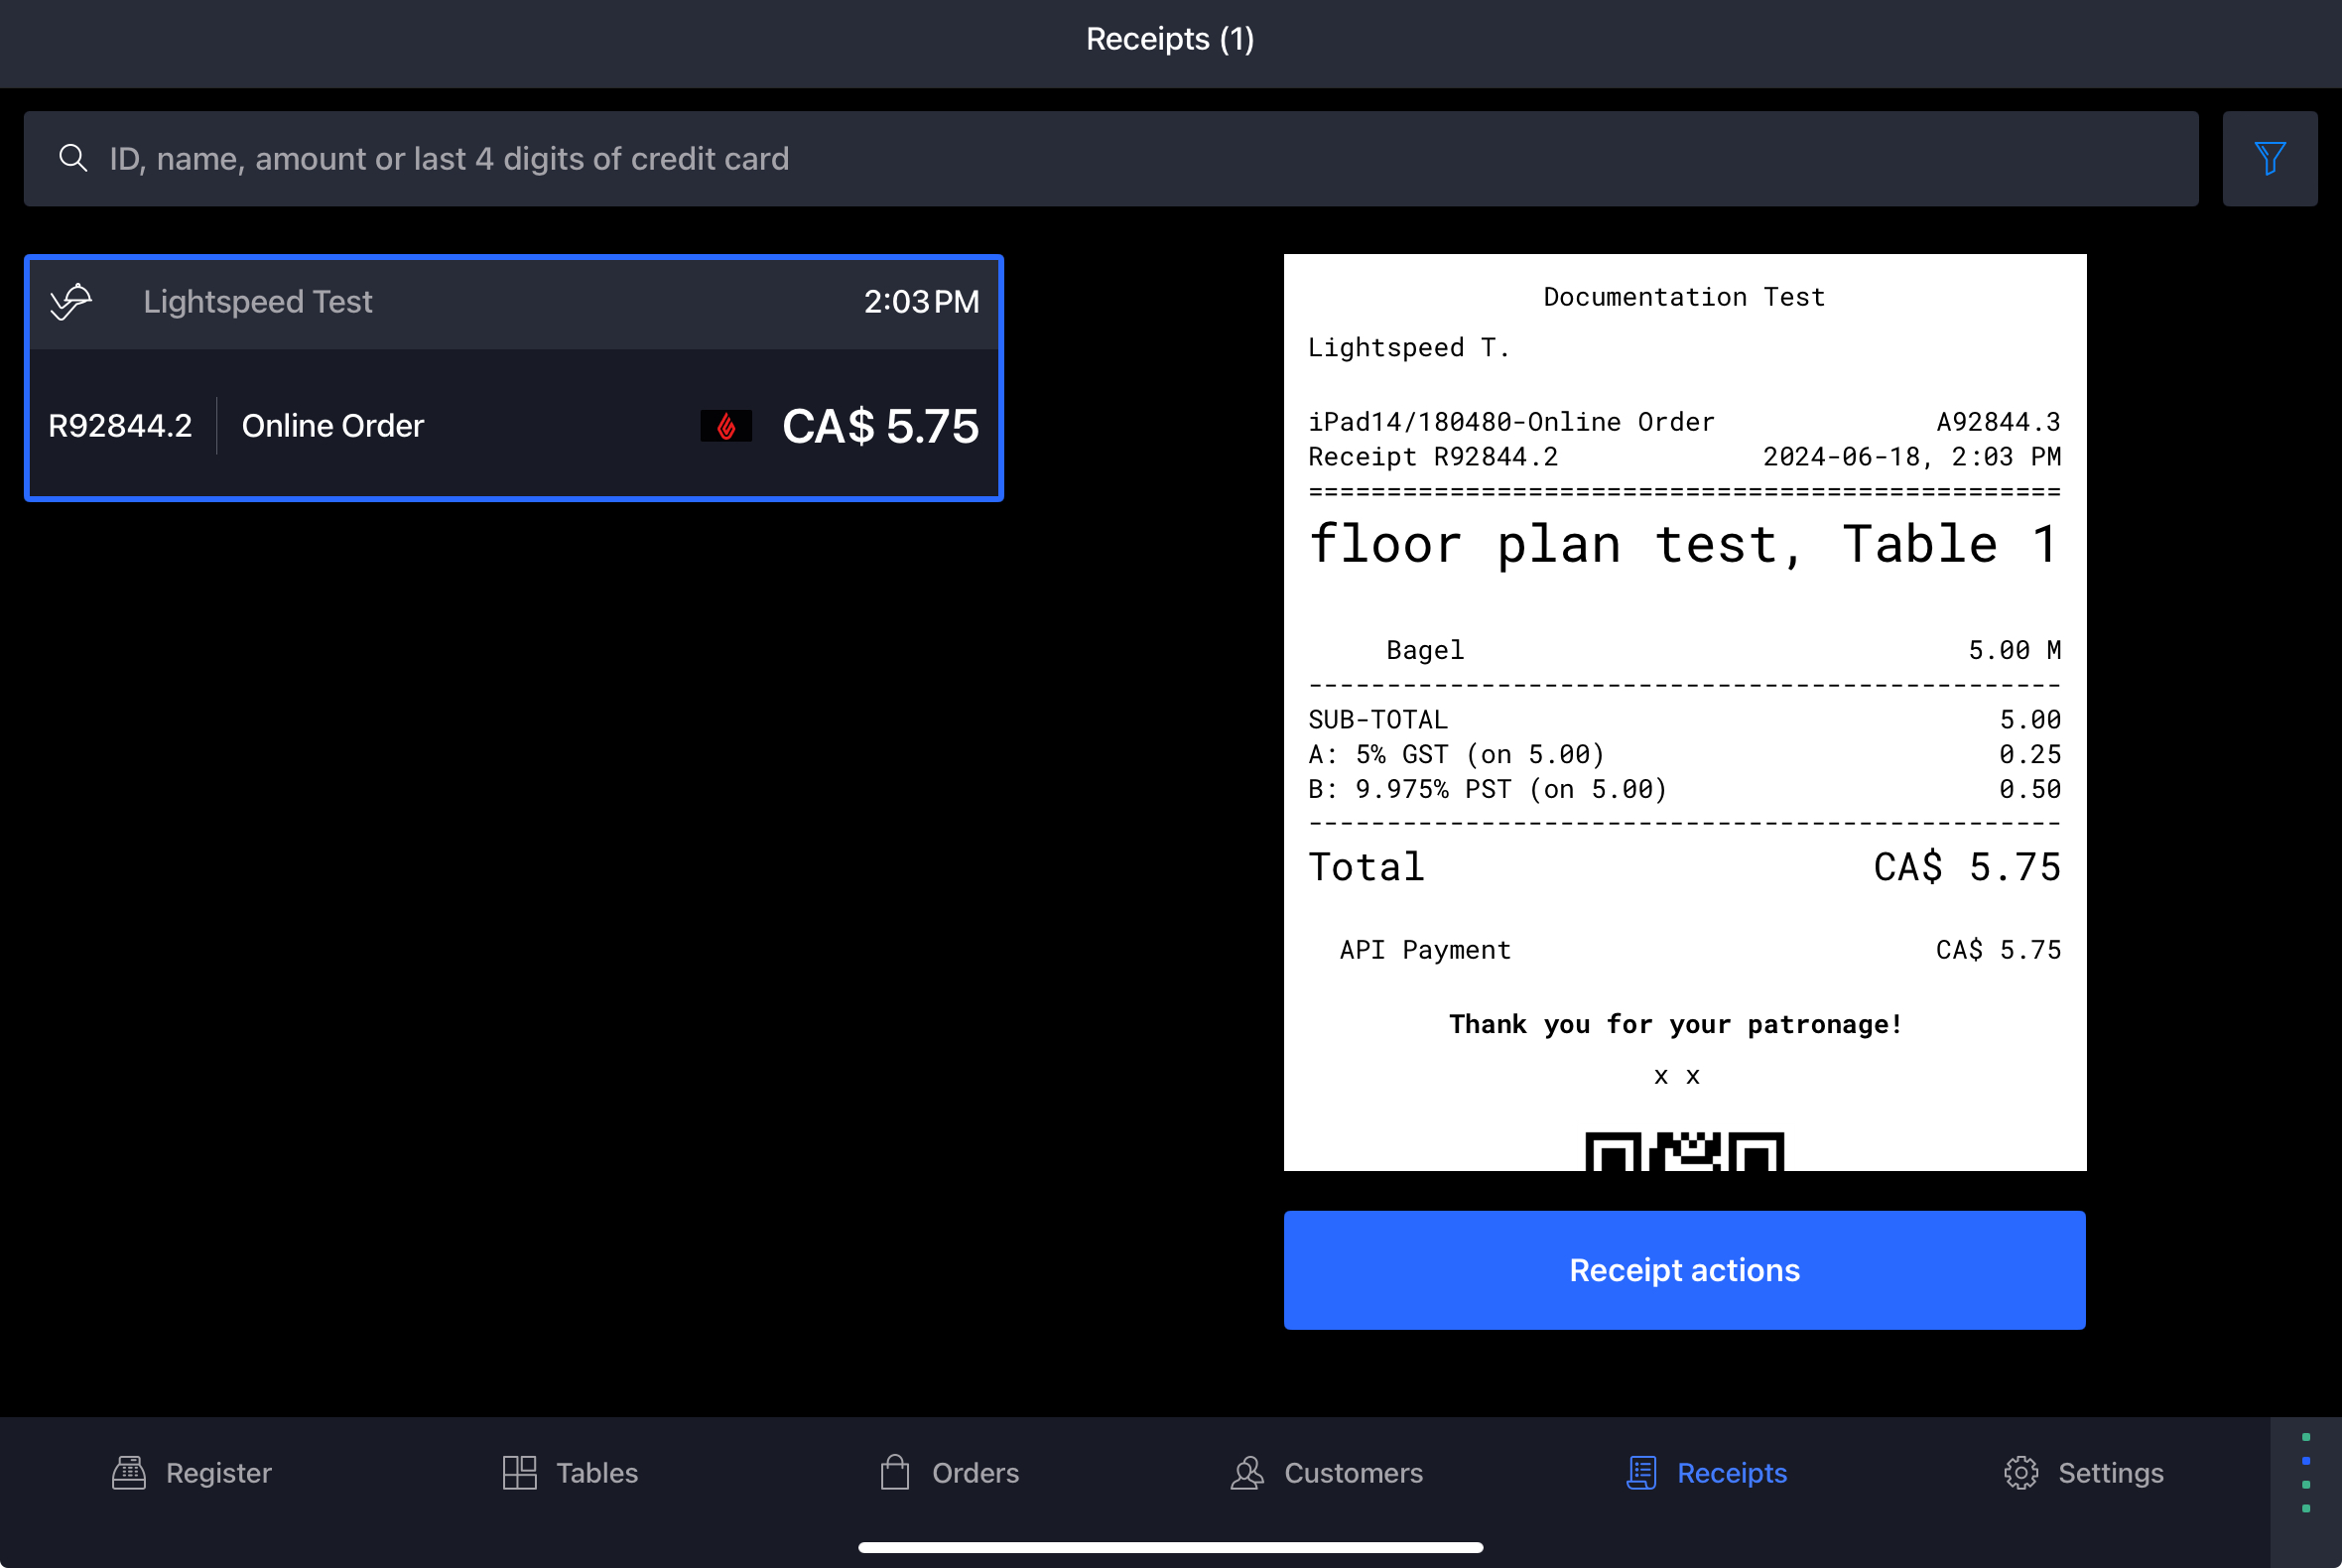
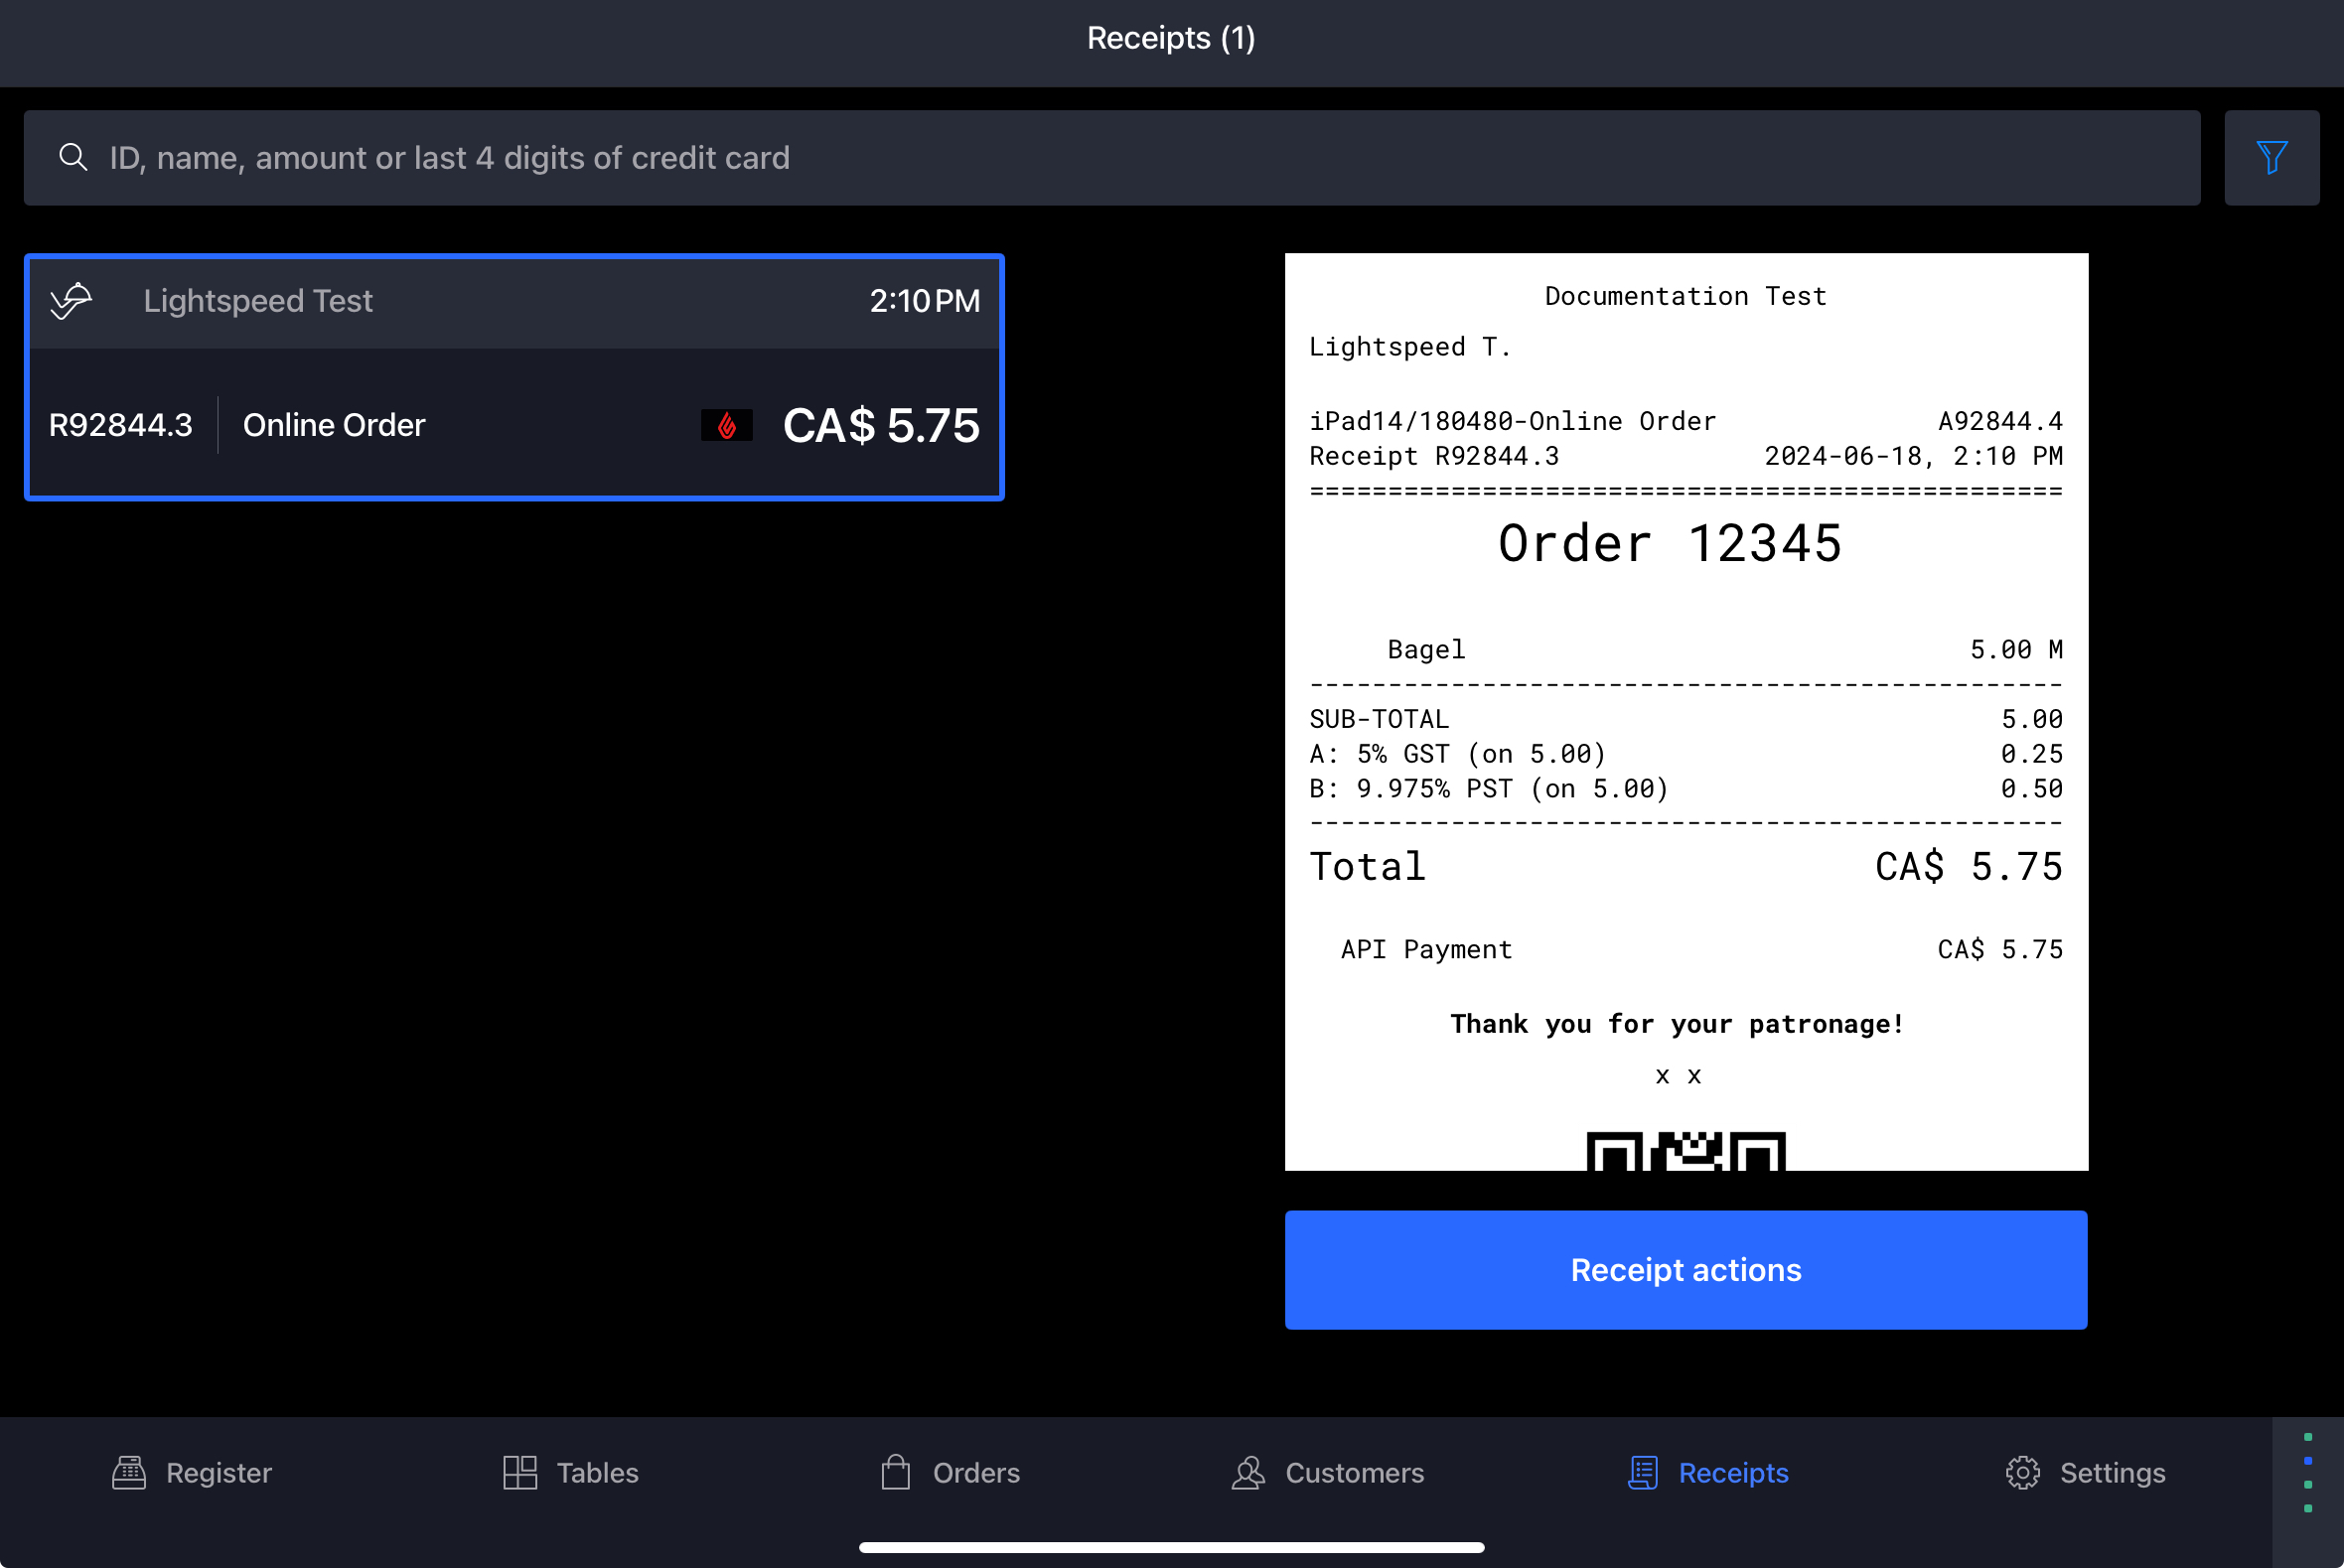
Both Local and To Go orders will appear on the receipt screen in the POS when they have been fully paid.
Below, you will find step by step instructions for creating both types of online orders.
-
Make sure you have a test account that is configured to receive online orders. You can request a test account in the Developer Portal. See Configuring Online Ordering for details on how to set up online ordering on your test account.
-
Make sure you have an up-to-date iPad with the latest version of the POS installed and connected to your test account. See the Help Center for more details.
-
If you want to send both types of orders, you will need separate Order Profiles set up for each one. For the purpose of this exercise, the default Order Profile for online ordering is a profile of type "Dine In".
-
Set up a Postman workspace by following our Setting Up Postman tutorial.
-
Make sure you have an access token for the account you will be working with. If you do not, please see our Authentication Tutorial
-
Make sure you have your businessLocationId saved in your Postman environment.
Part 1 - Retrieve item details
Step 1 - Load all menus
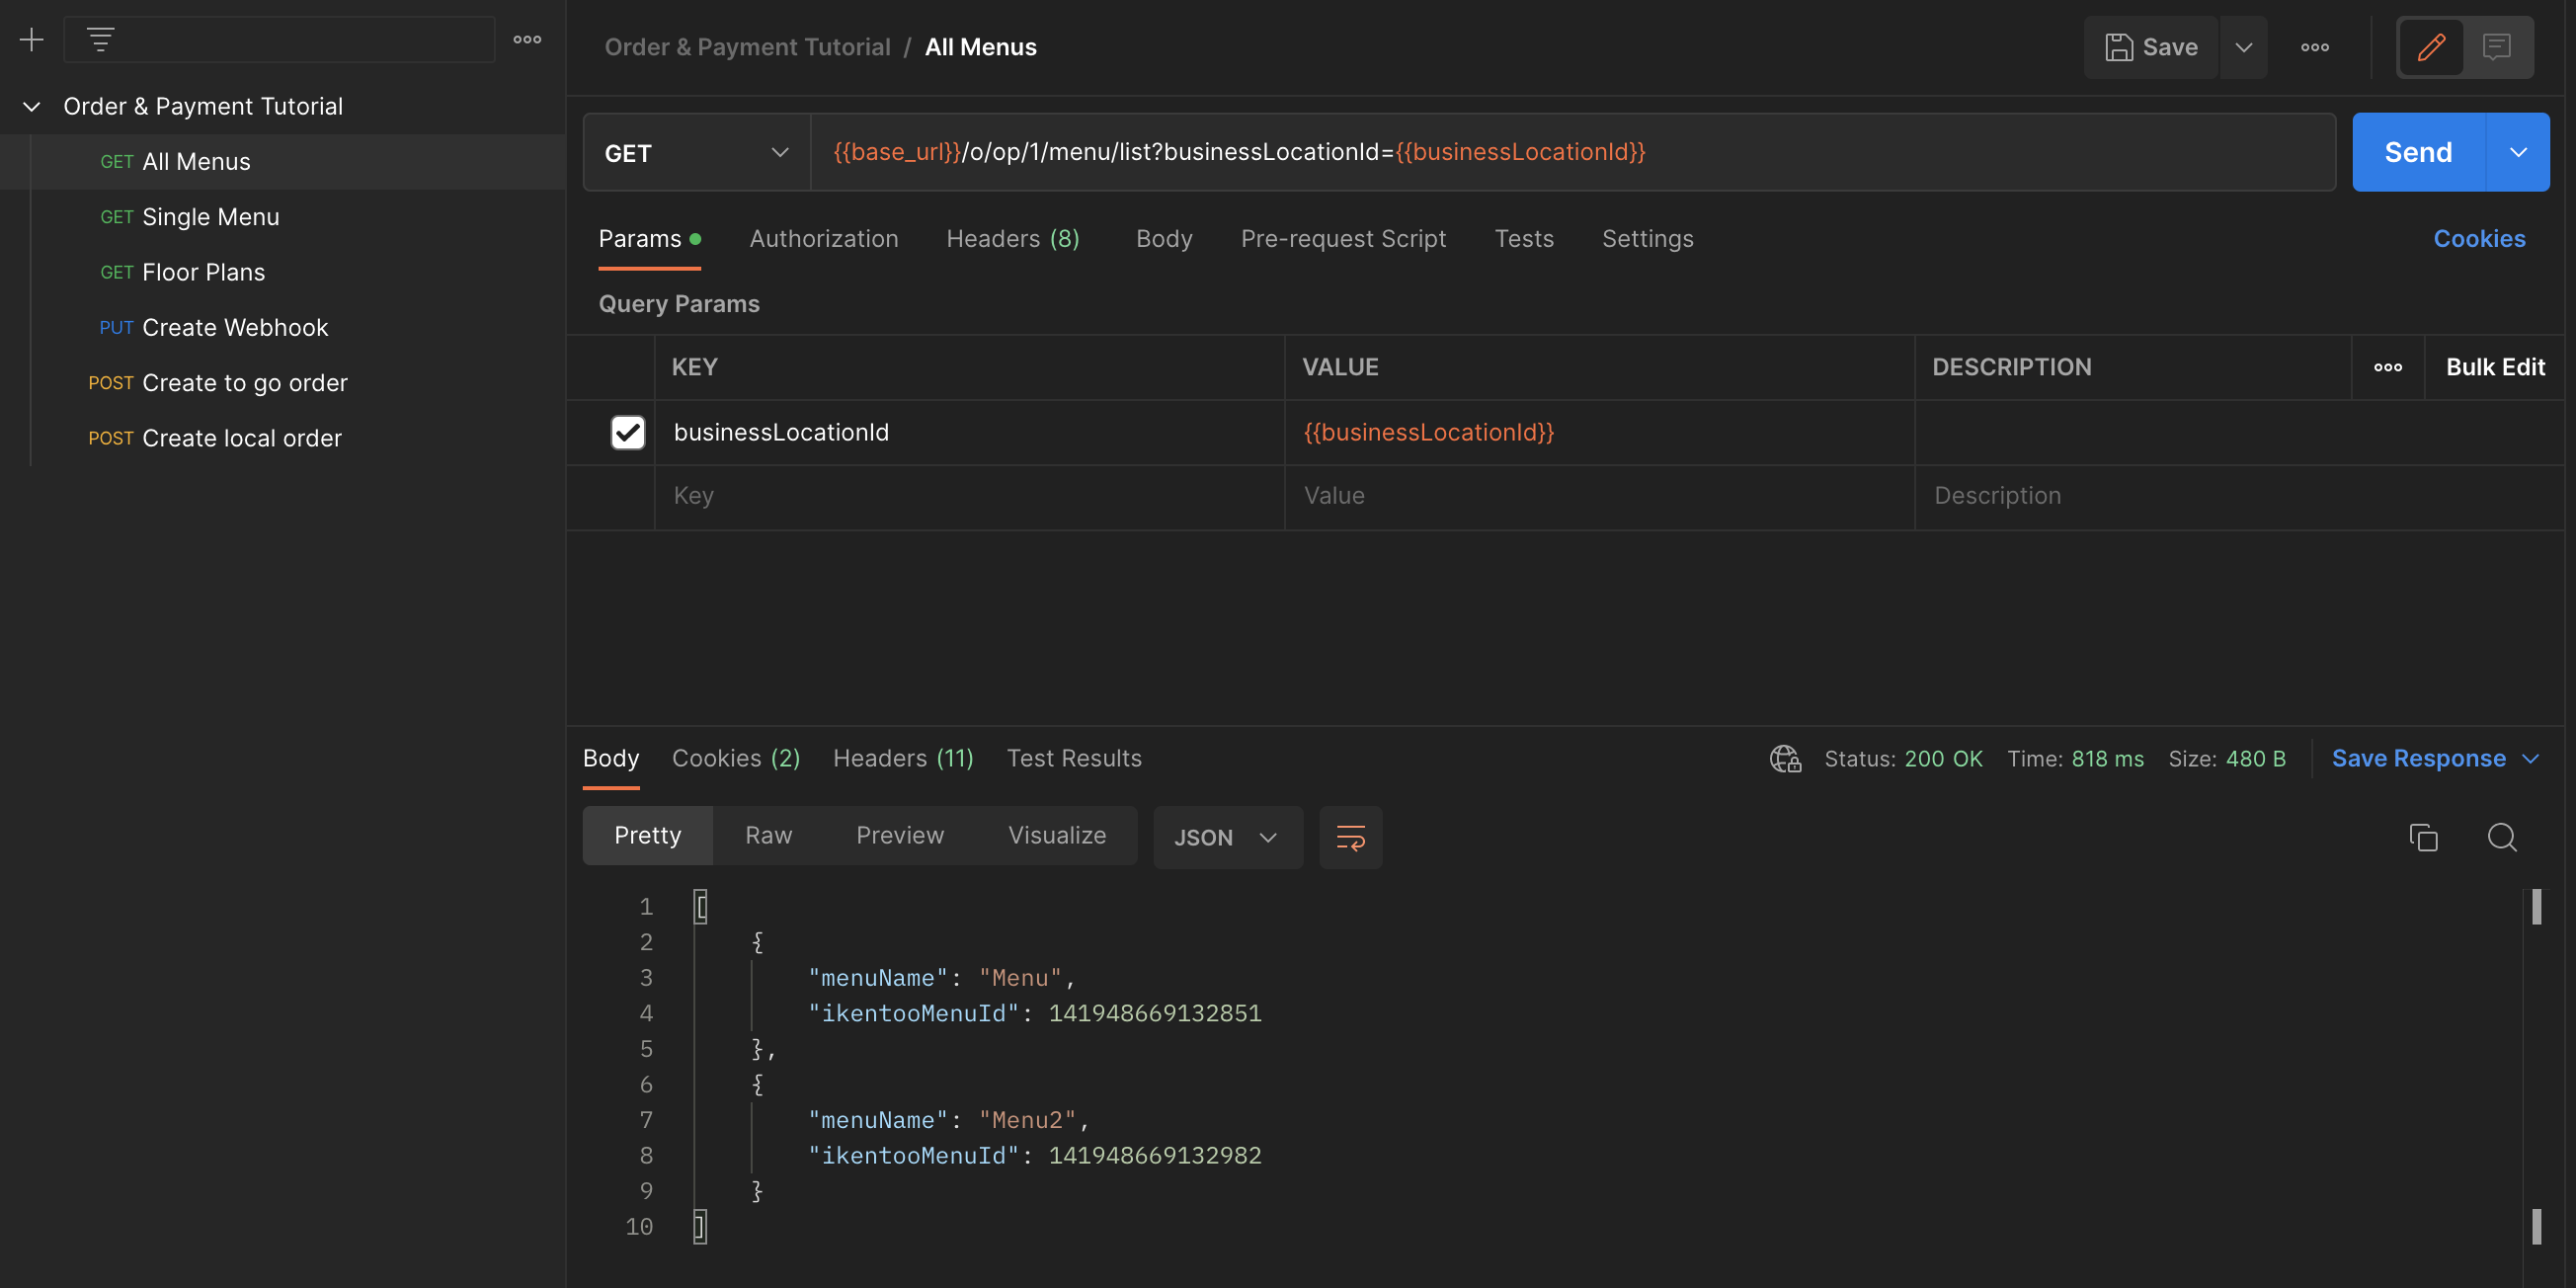
Open the Order & Payment Tutorial folder in your Postman workspace an send the GET All Menus request. This will return all the available POS menus. Copy the ikentooMenuId of the menu you wish to work with.
Step 2 - Load Specific Menu
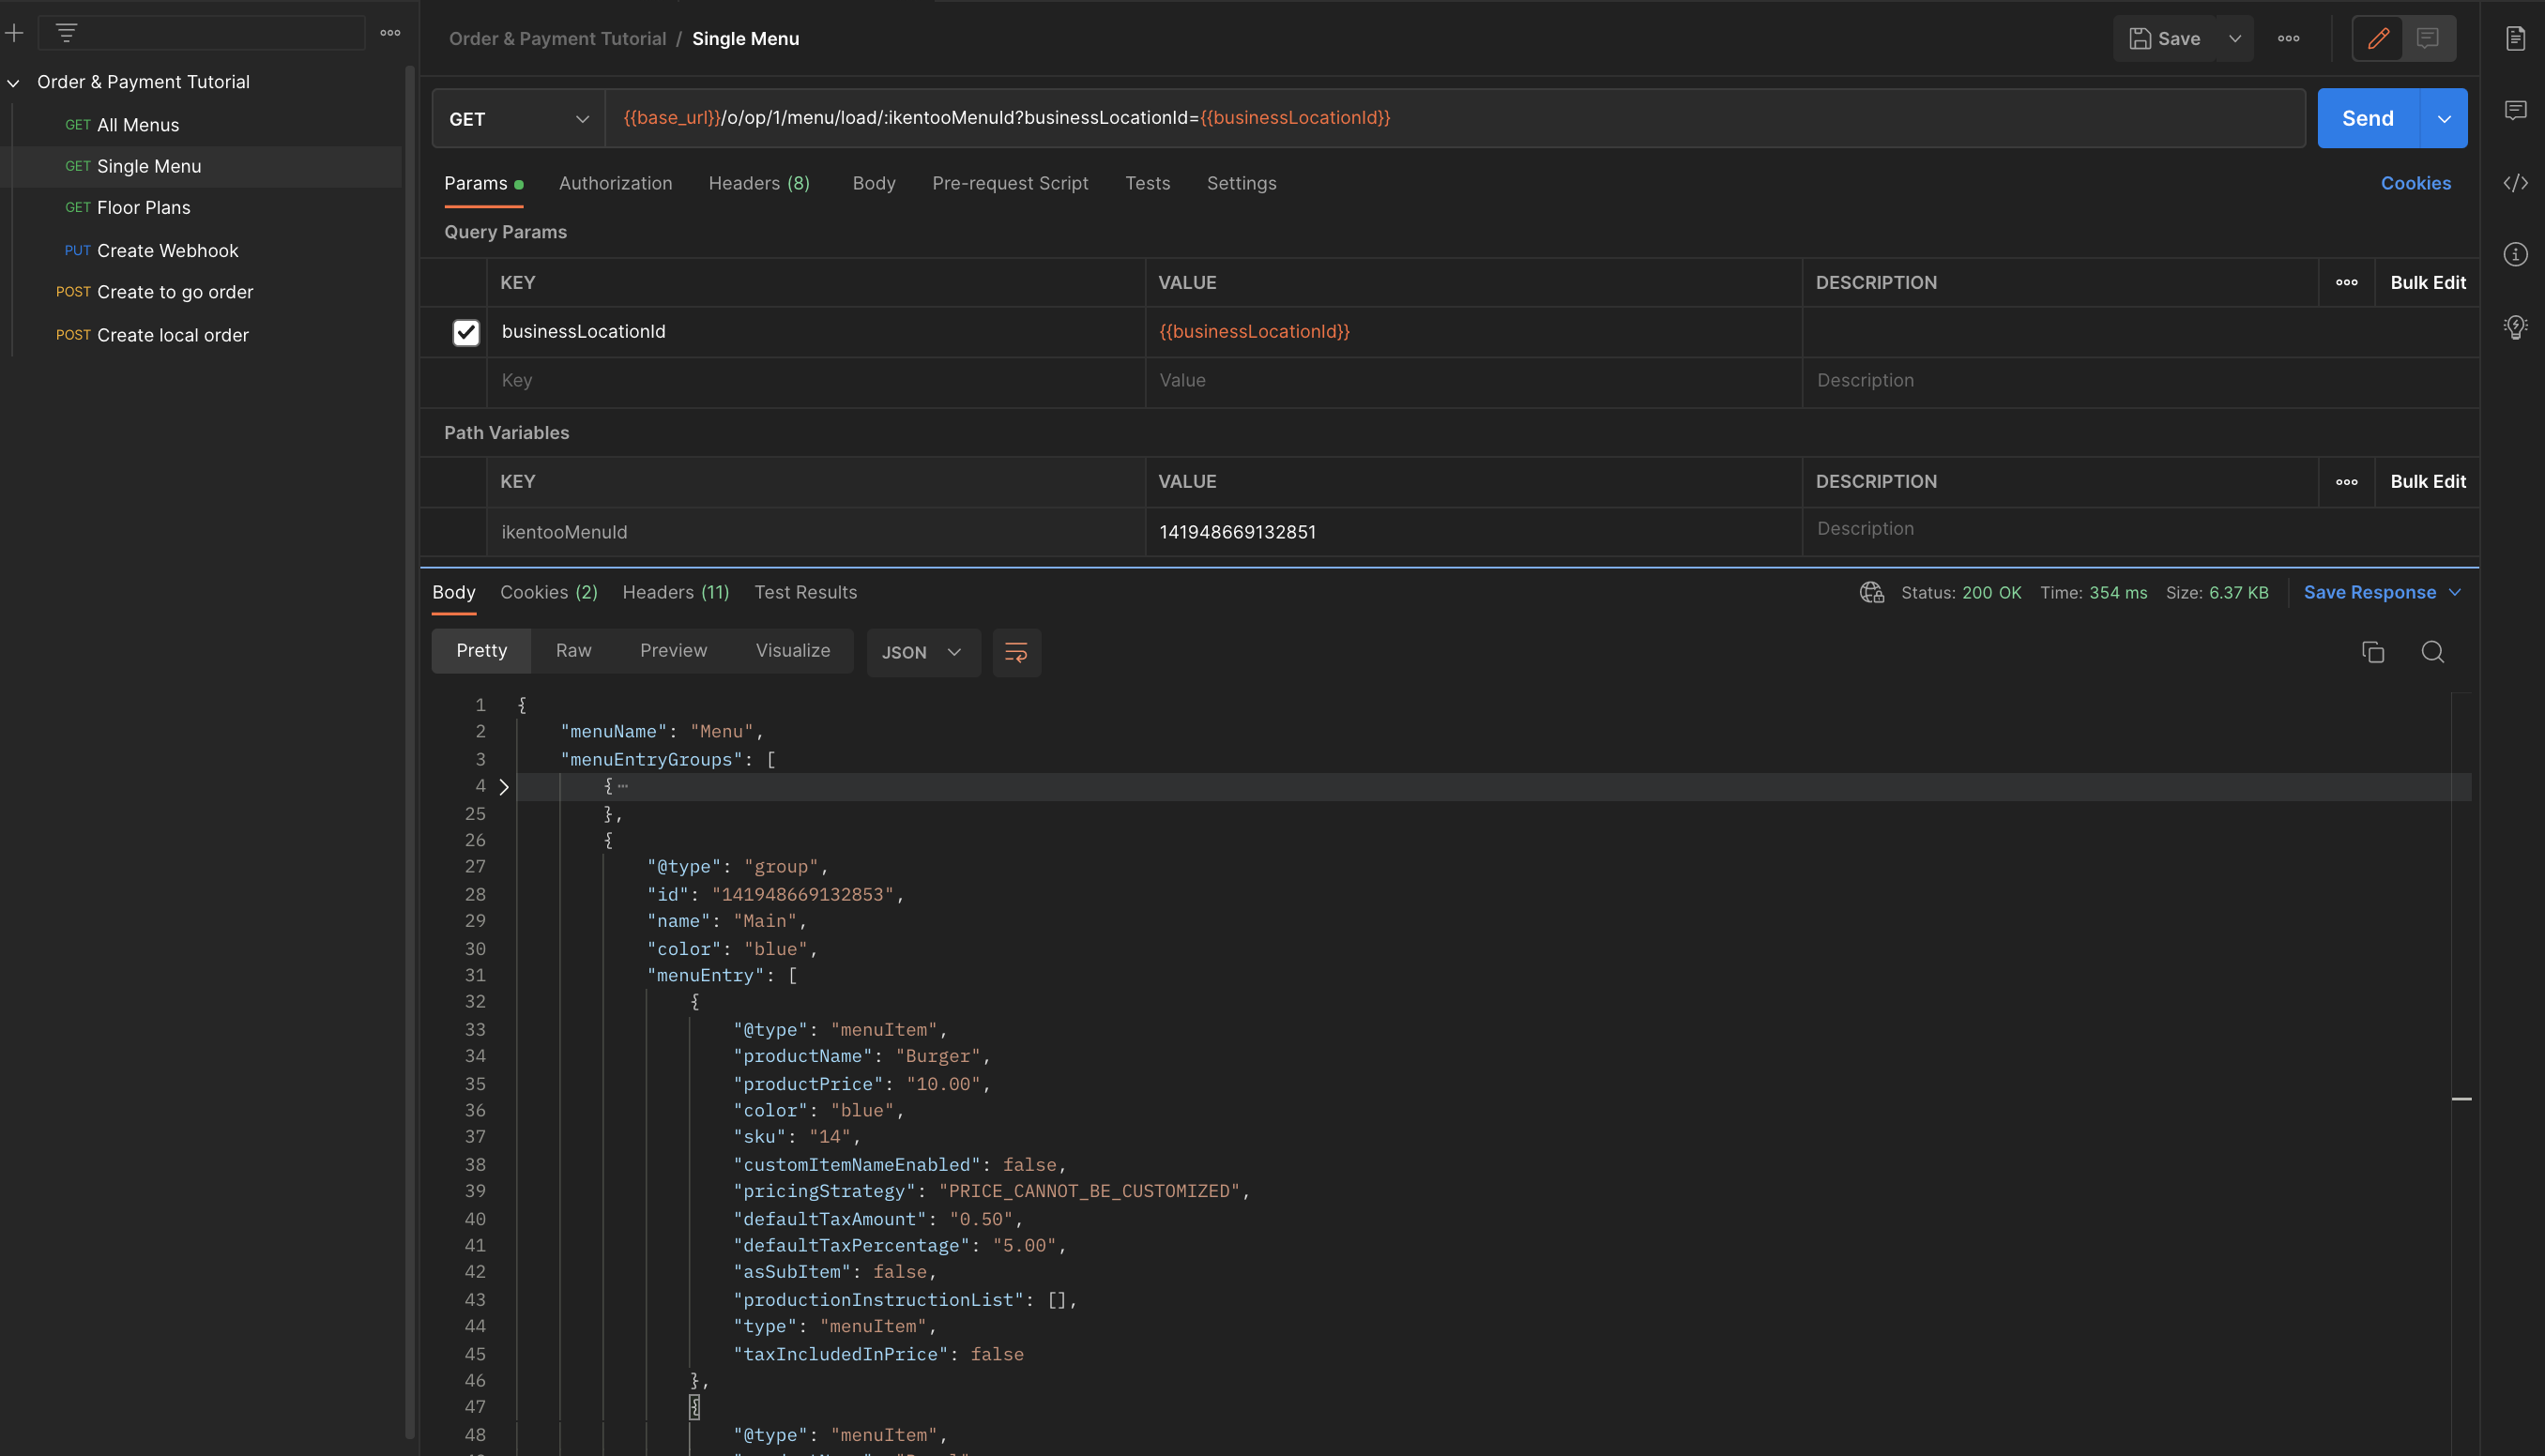
Open the GET Single Menu request. Paste the ikentooMenuId into the Path Variables in the Params tab and click 'Send.' This will return the menu details. Save this response for later use.
Step 3 Retrieve Floor Plan Details (Local Orders Only)
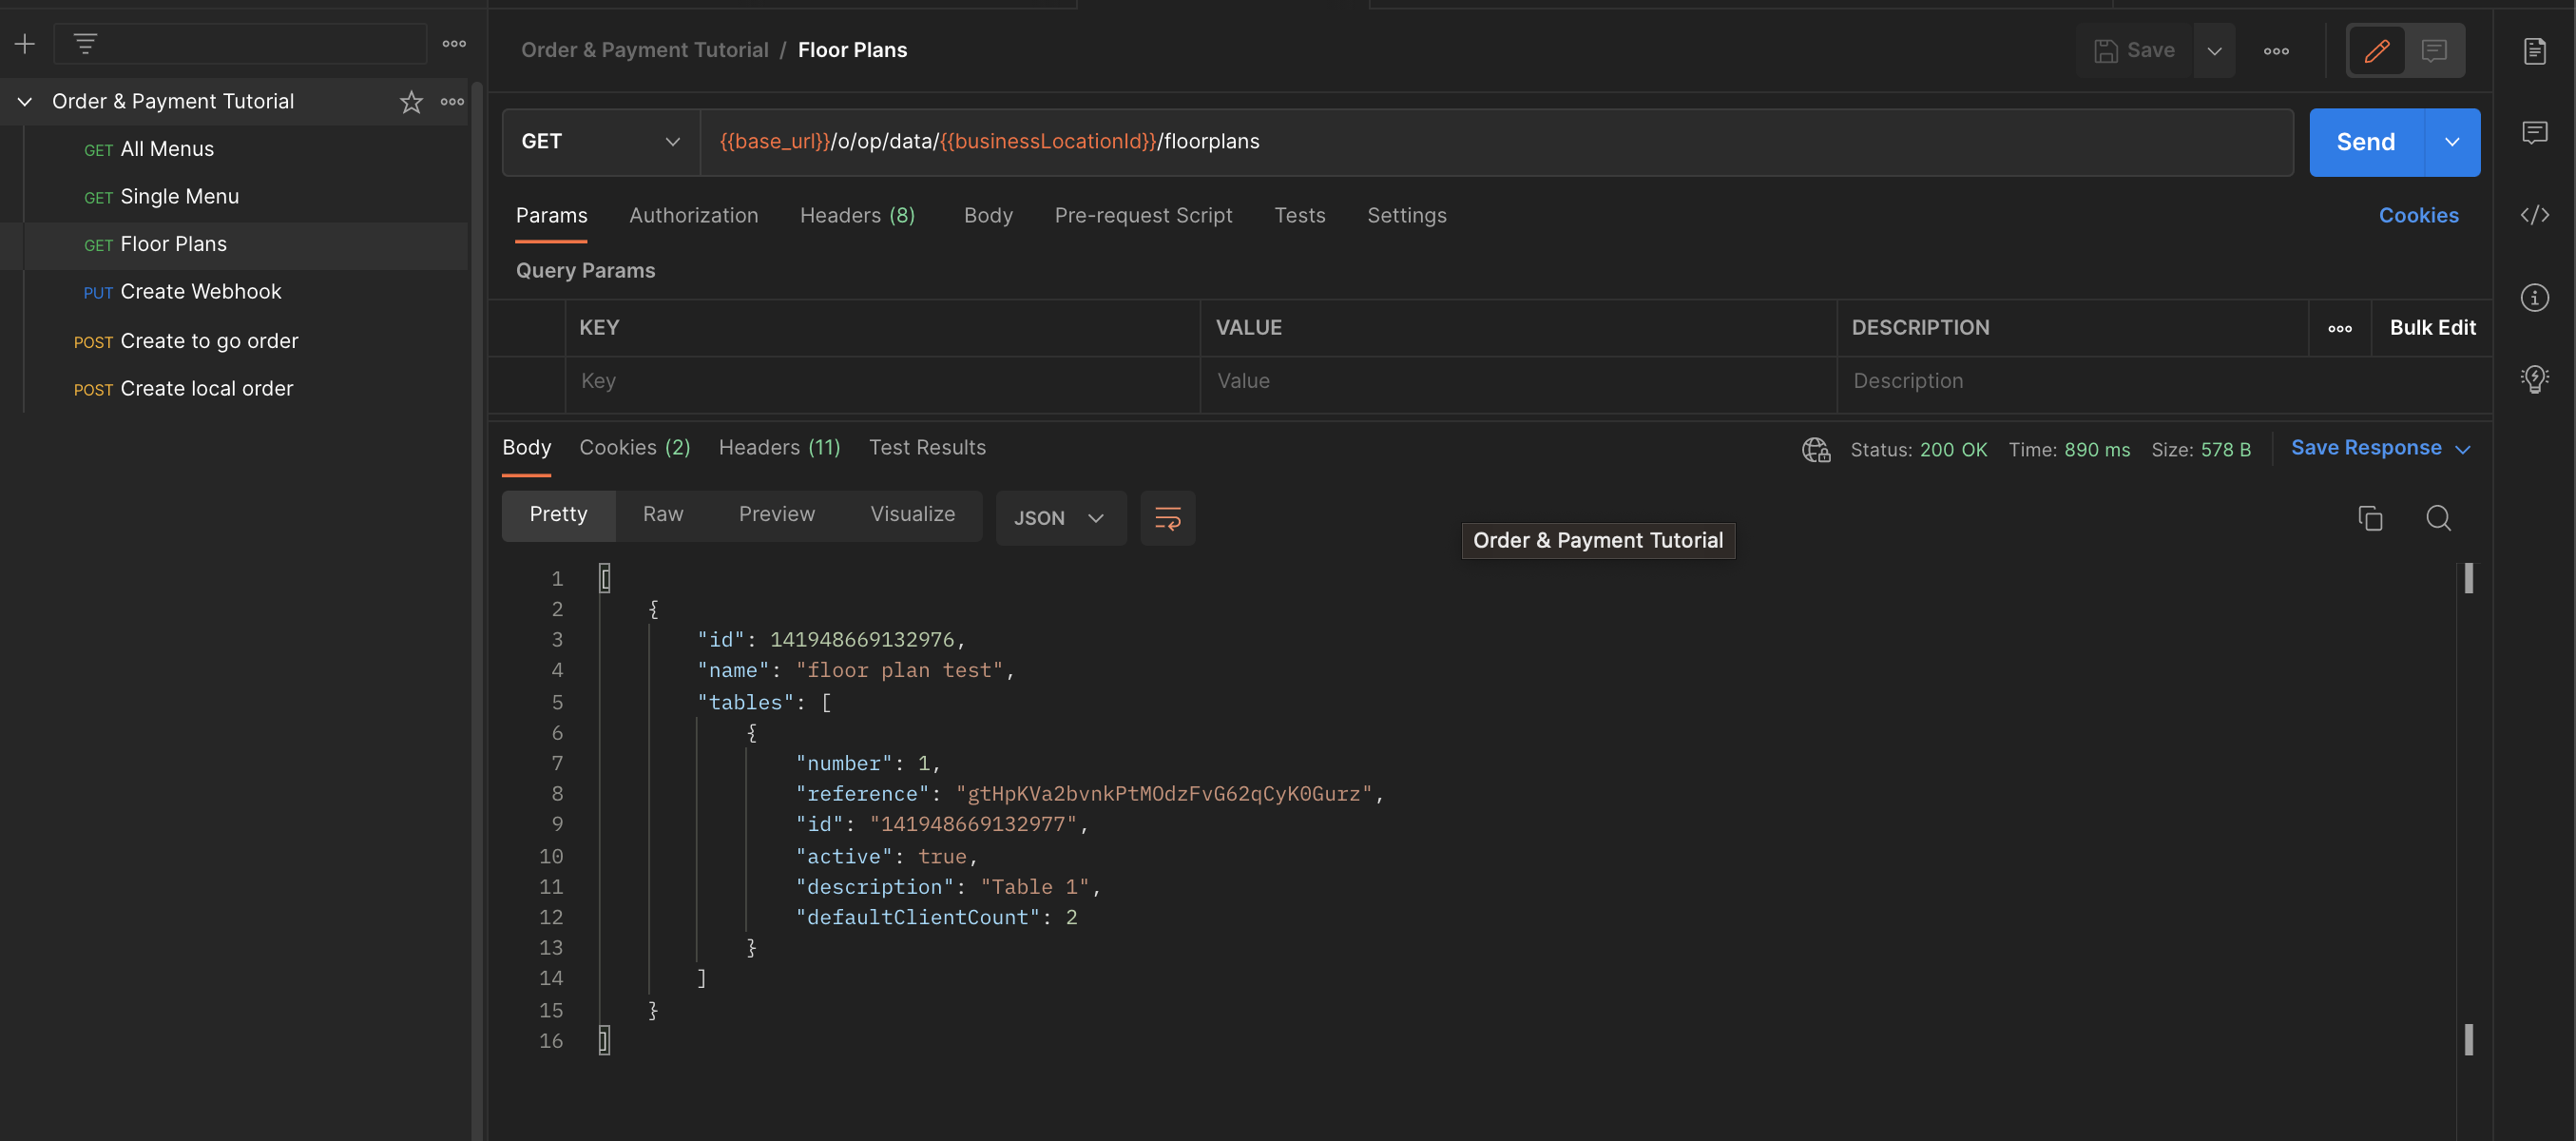
Open the GET Floor Plans request. This will return the available tables. Save this response for later use.
Part 2 - Create a Webhook
Step 1
Navigate to webhook.site and copy the URL that it generates.
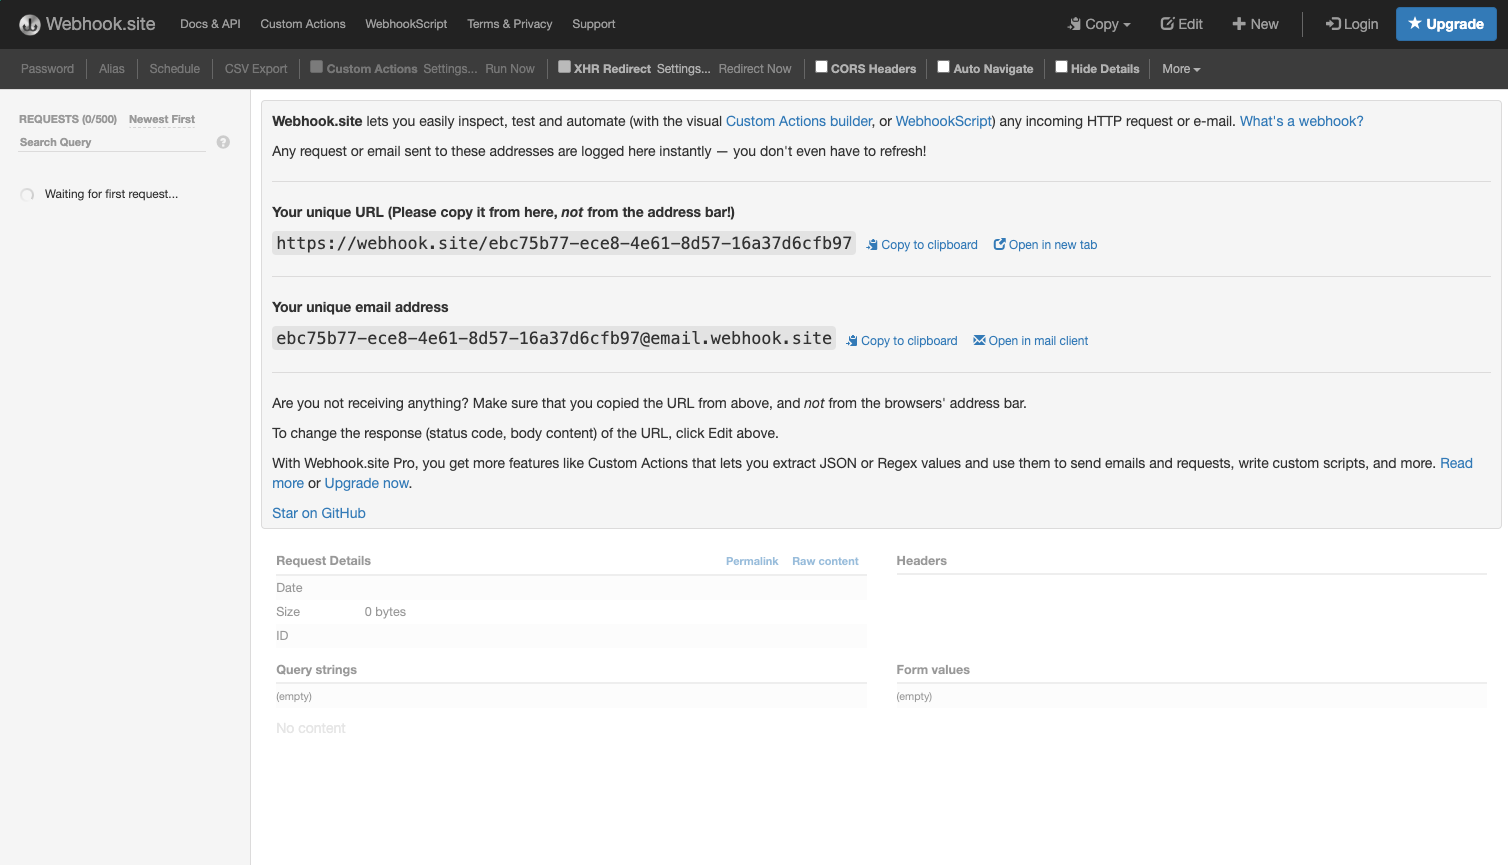
Step 2
Open the PUT Create Webhook request and paste the URL into the url field of the request body. Enter a name for the webhook in the endpointId field. Leave the other fields as is.
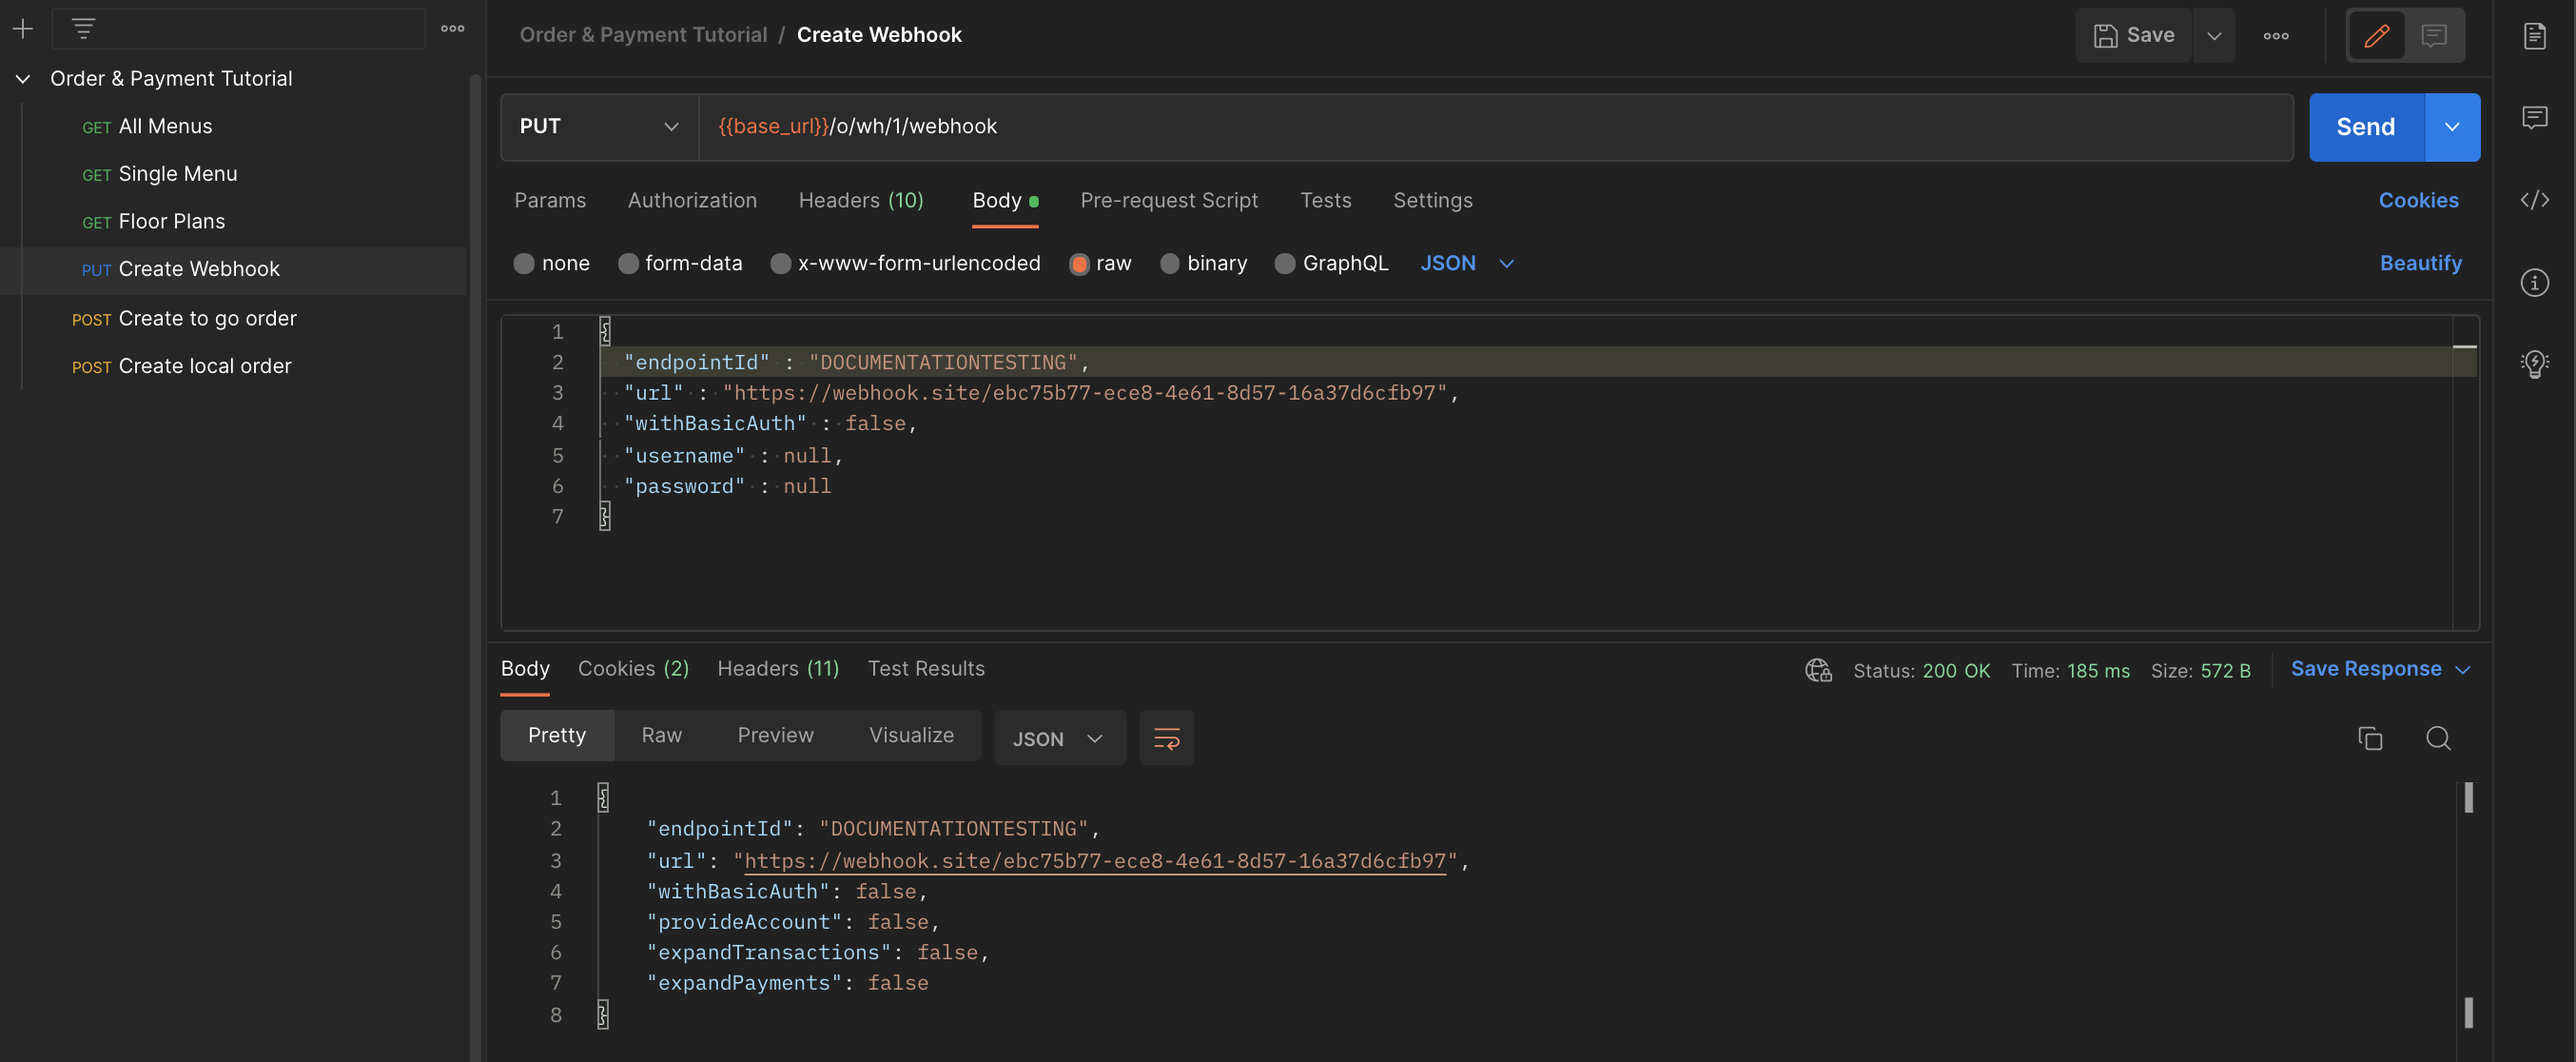
When withBasicAuth is set to true you can set a username and password for the webhook. This gives you the option to authenticate the requests being sent to your endpoint.
Part 3 - Build your online order payload
Use the details collected in Part 1 to populate your order request. Below you will find some example request bodies.
For both types of order, you will need to add the following to the payload:
- At least one item
skufrom your menu, along with a quantity. - Your newly created
endpointId. - A
thirdPartyReference. ThethirdPartyReferencecan be any string, and must be unique for each order.
Section A) is for Local orders
Section B) is for To Go orders
Step 1
A) For Local Orders, you will also need to add a tableNumber to your payload.
Example request body:
    {
        "businessLocationId":{{businessLocationId}},
        "thirdPartyReference":"UNIQUEORDERREFERENCE",
        "endpointId" : "DOCUMENTATIONTESTING",
        "customerInfo" : {
            "firstName" : "Jane"
        },
        "tableNumber": "1",
        "items" : [ {
            "quantity" : 2,
            "sku" : "14"
        },
        {
            "quantity" : 2,
            "sku" : "FT1"
        } ]
    }
B) For To Go orders, you will also need to fill in the accountProfileCode for your Takeaway order profile.
Example request body:
    {
        "accountProfileCode": "AAP-TOGO",
        "businessLocationId":{{businessLocationId}},
        "thirdPartyReference":"UNIQUEORDERREFERENCE10",
        "endpointId" : "DOCUMENTATIONTESTING",
        "customerInfo" : {
            "firstName" : "Jane"
        },
        "items" : [ {
            "quantity" : 2,
            "sku" : "14"
        },
        {
            "quantity" : 2,
            "sku" : "FT1"
        } ],
        "takeAway": true
    }
Part 4 - Send the order
Step 1
A) Paste your Local Order request into the Body section of the POST Create Local Order request.
Click 'Send':
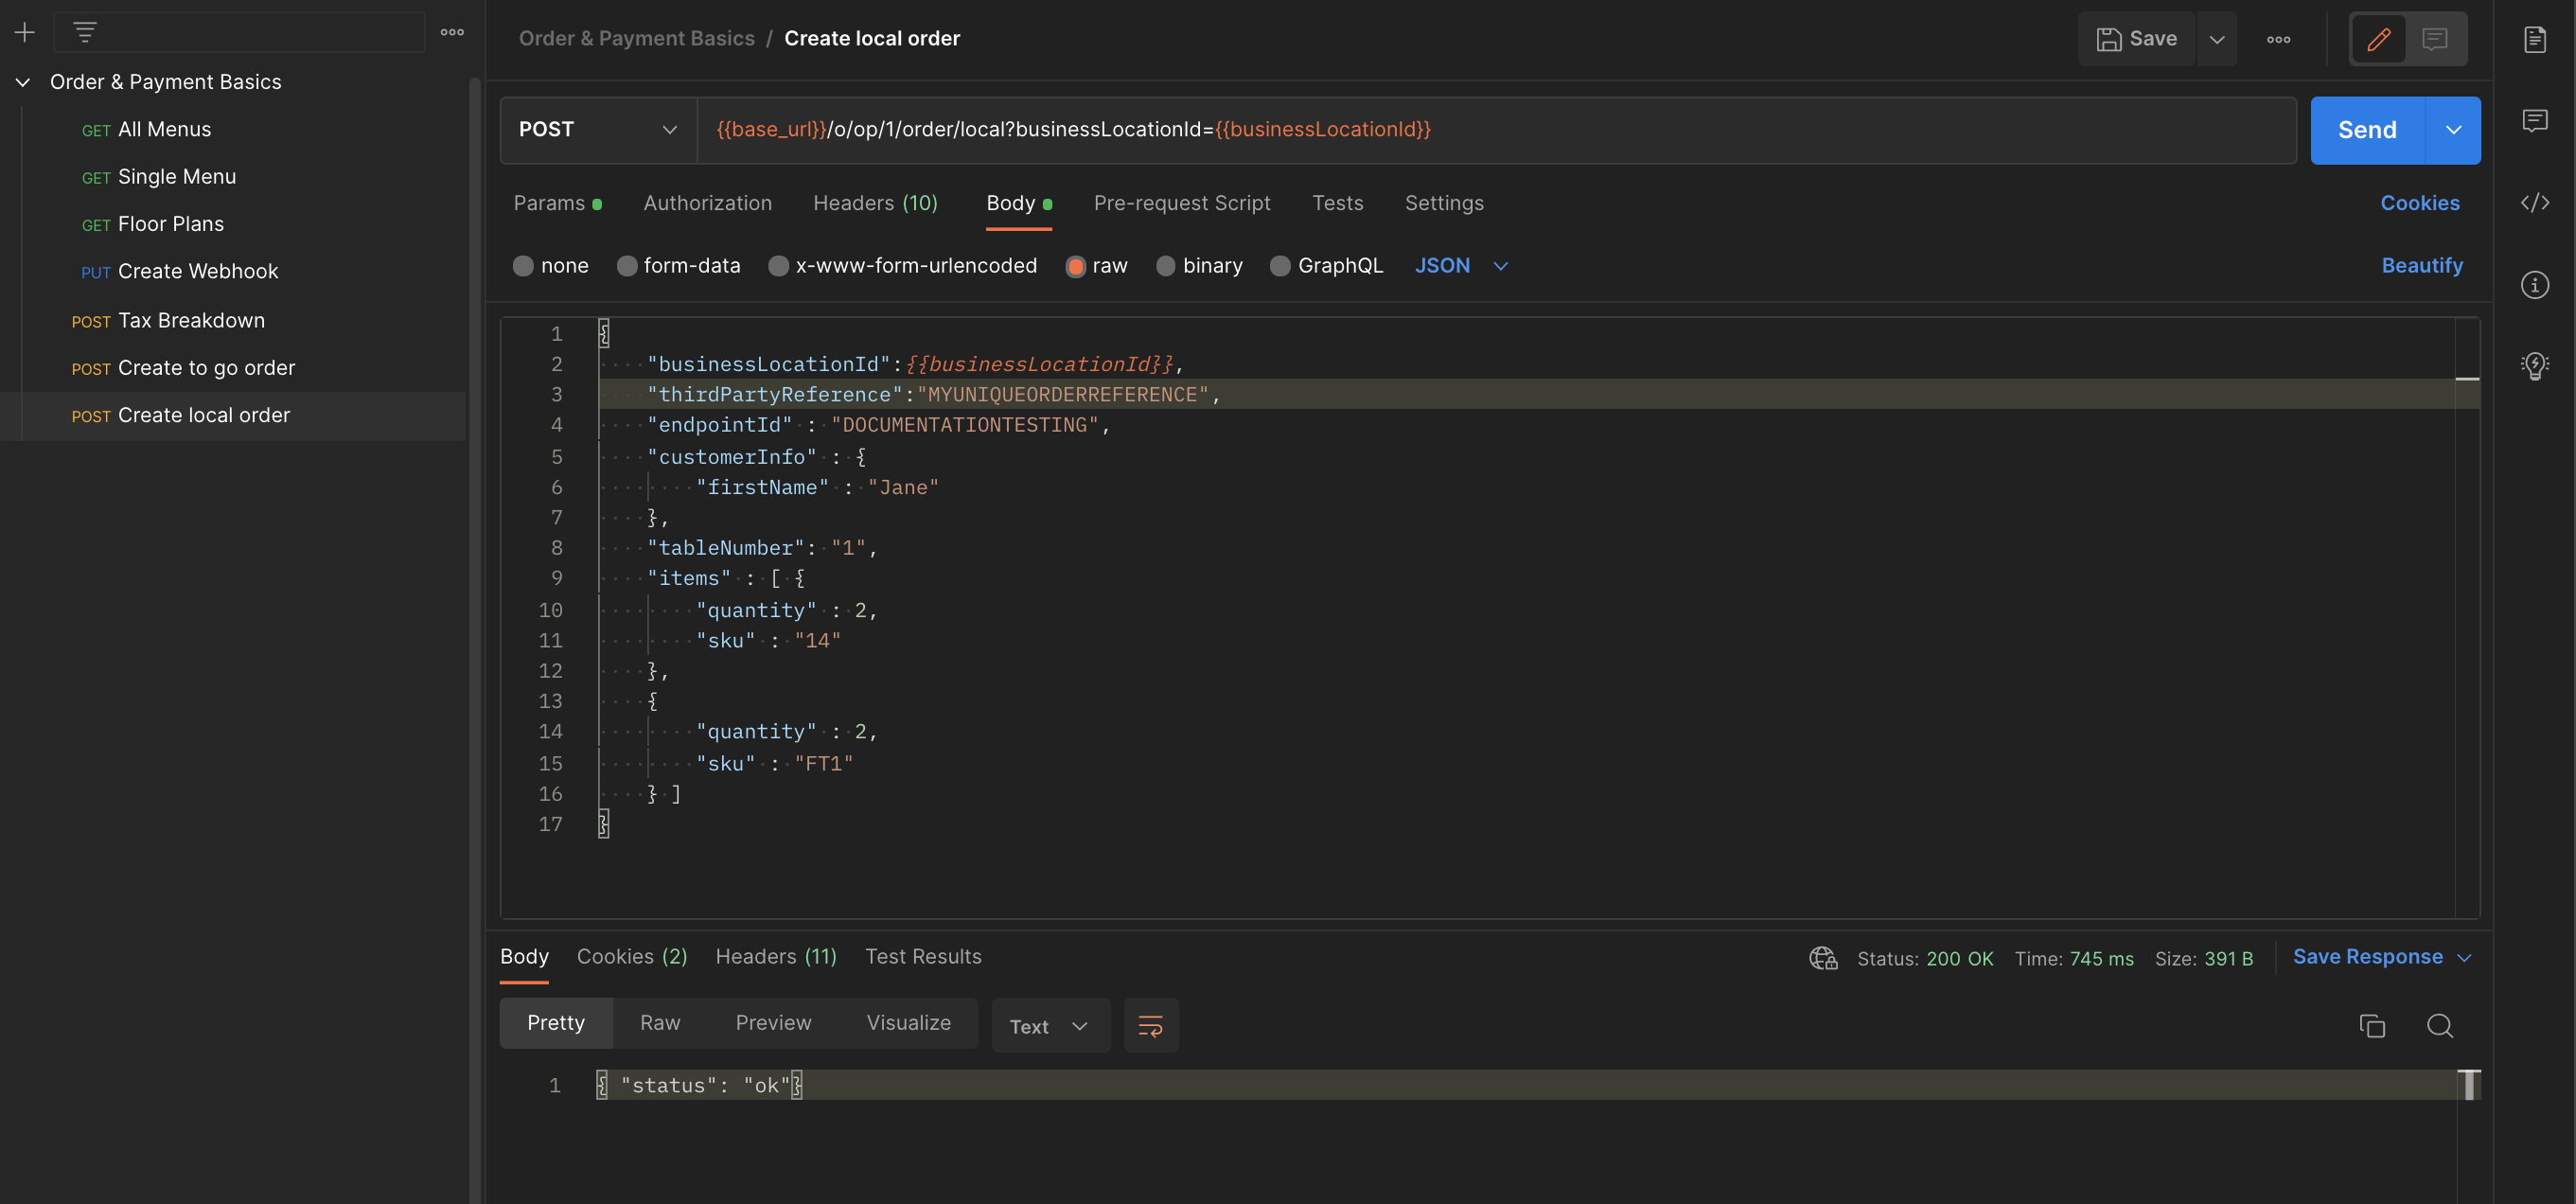
B) Paste your To Go Order request into the Body section of the POST Create To Go Order request.
Click 'Send':
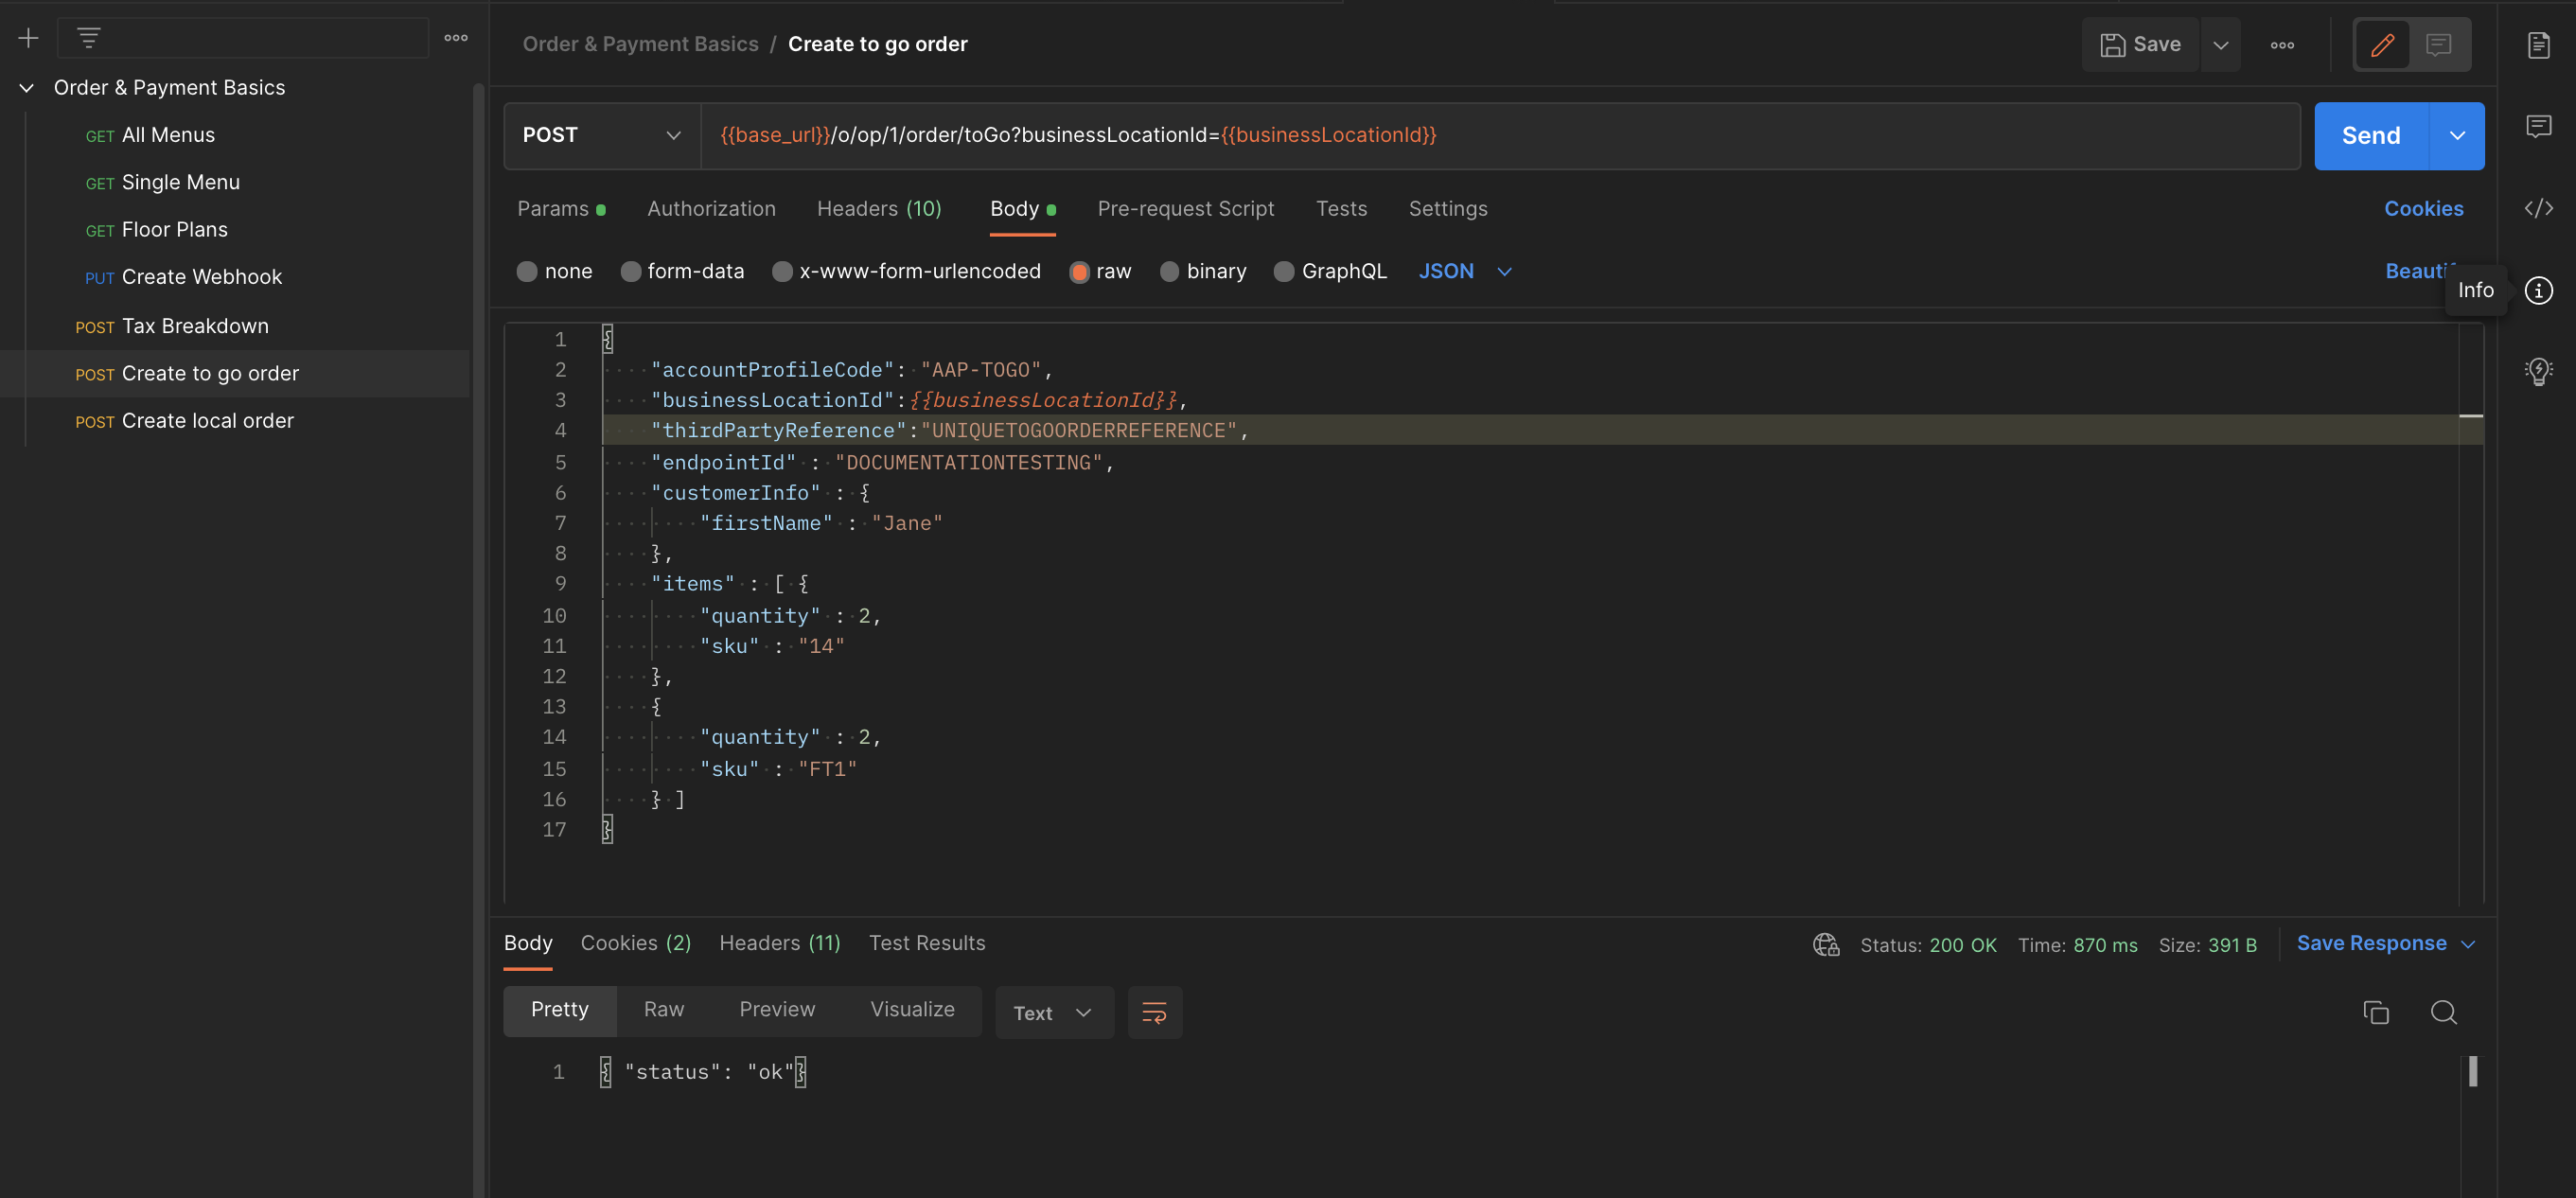
You will receive a 200 OK response. This means that the order has been successfully received, but doesn't necessarily mean that it has been sent to the POS. This must be confirmed via the webhook.
Step 2
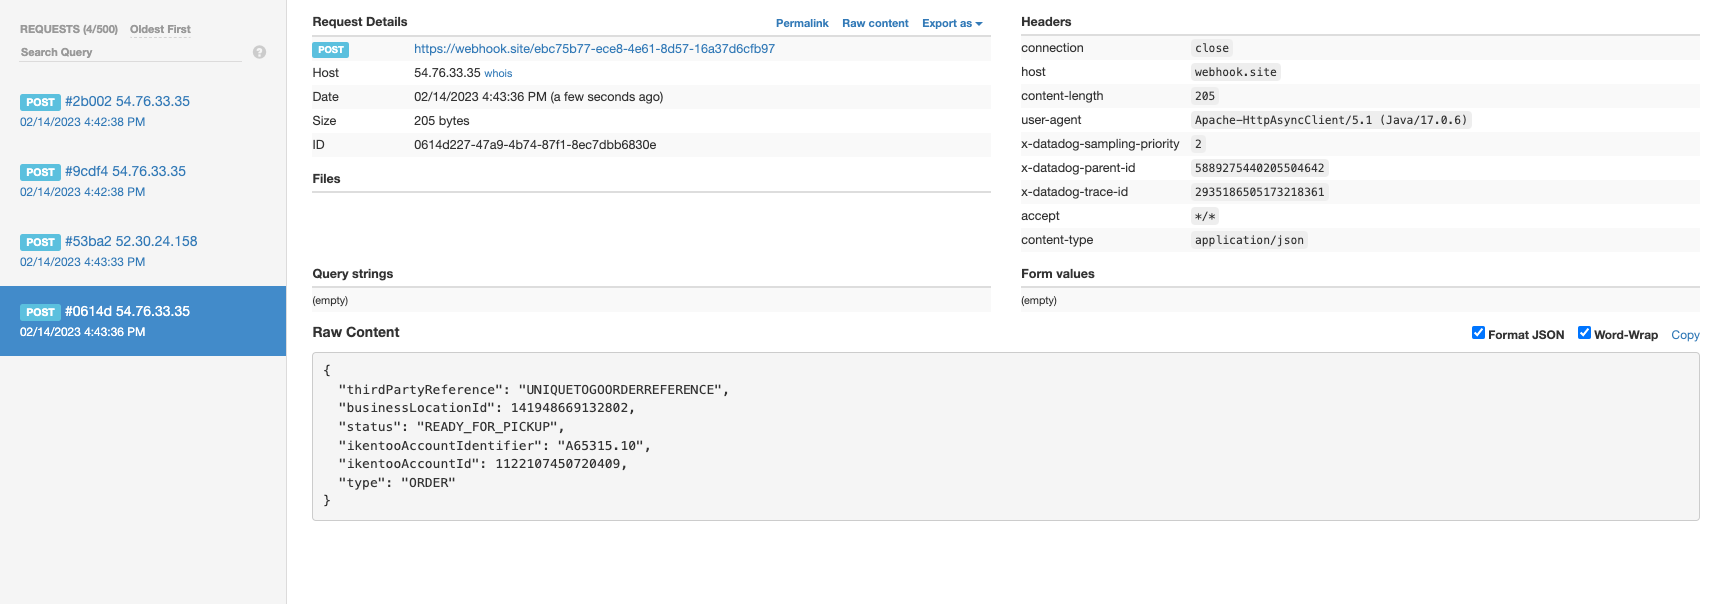
Two confirmation webhooks should be sent to your endpoint.
A) Local Order:


B) To Go Order:

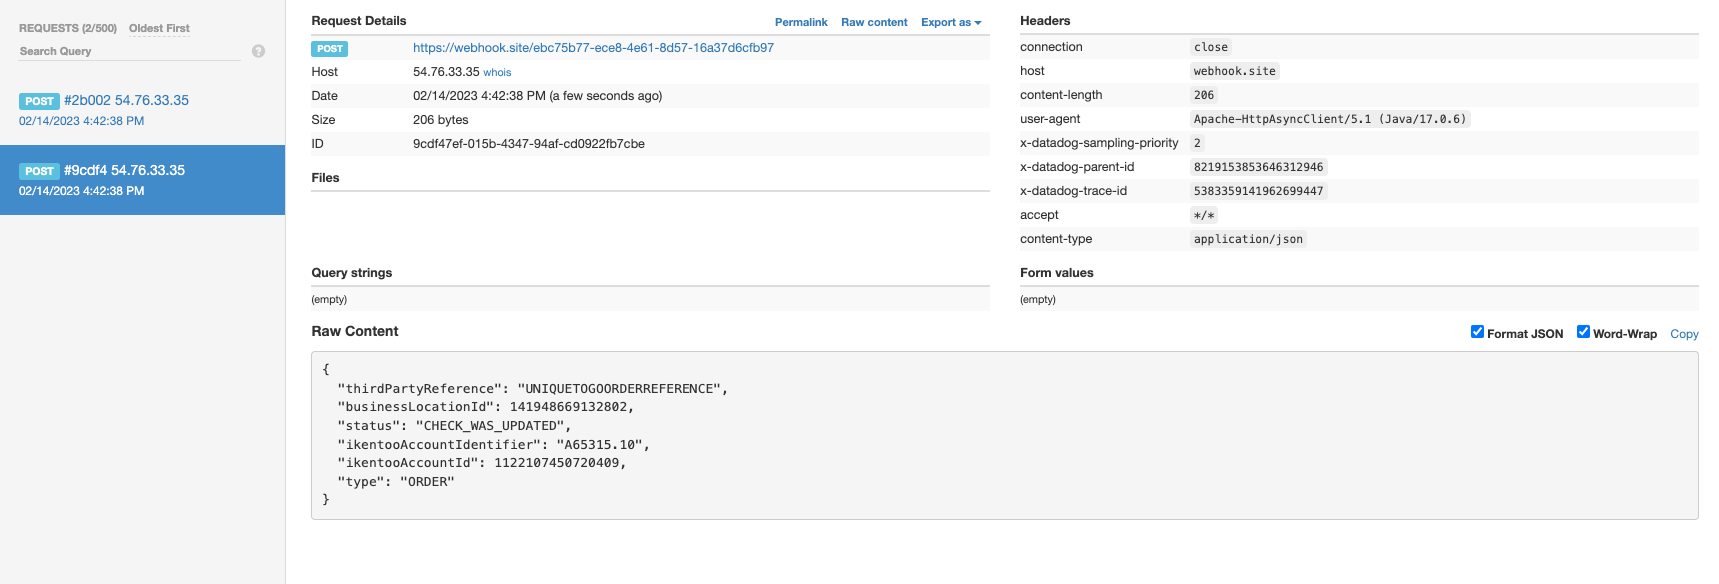
If there is a problem with the order, an error message will be sent to the webhook, indicating the reason for the issue. In this case, the order will not be sent to the POS. It will need to be corrected and sent again.
Step 3
The order will appear in the POS.
A) Local Order:
Unnpaid or Partially Paid:
Fully Paid:
B) To Go Order
Unnpaid or Partially Paid:
Fully Paid:
Step 4
Once the order is closed, you'll receive another webhook, in the case of To Go orders, you will receive two.
A) Local Order

B) To Go Order

